How to Install PEX Pipe in a Mobile Home
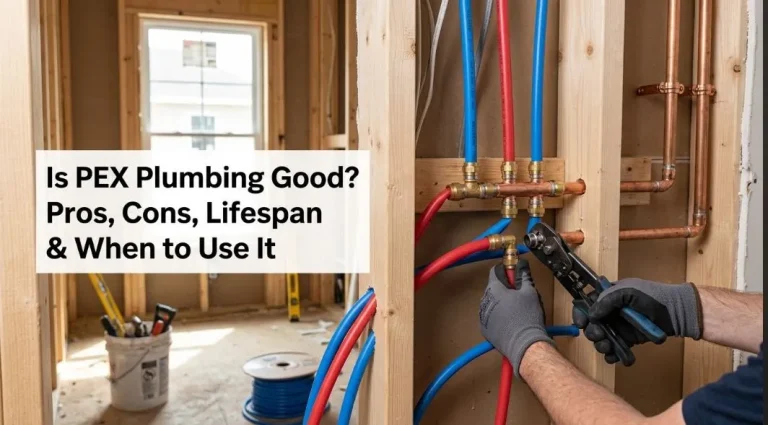
Installing PEX pipe in a mobile home is usually easier than working with rigid pipe because PEX is flexible, lightweight, and can make long runs with fewer fittings. But mobile homes have one major difference: much of the plumbing runs underneath the home, where it is exposed to movement, cold temperatures, and limited working space.
The basic process is straightforward: shut off the water, drain the old system, plan the new pipe runs, remove damaged pipe, install correctly sized PEX and fittings, support the tubing, protect it from freezing, and pressure-test the system before closing everything up.
For a HUD-code manufactured home, you also need to follow the home’s manufacturer instructions and applicable state and local requirements. HUD’s plumbing standards specifically address water distribution, pipe sizing, plastic piping, supports, pressure, and testing.
Before You Start: Is Your Home Actually a Manufactured Home?
People commonly use “mobile home” and “manufactured home” interchangeably, but there is an important distinction. HUD says manufactured homes built in the United States after June 15, 1976 must meet the federal Manufactured Home Construction and Safety Standards. Those standards include plumbing requirements.
If your home was built before that date, do not automatically assume the current HUD requirements apply to every part of the existing plumbing system. Check the home’s documentation and local requirements before starting a major repipe.
Why PEX Works Well in a Mobile Home
PEX is particularly practical under a manufactured home because it bends around obstacles without requiring a fitting at every turn. That can mean fewer connections under the floor and a simpler installation.
PEX also comes in long coils, which makes it useful when replacing long sections of old plumbing. However, flexibility does not mean you should simply let the pipe hang underneath the home like a garden hose. The tubing still needs proper support and protection.
HUD’s manufactured-home standards require plastic water piping to be supported closely enough to keep it aligned and carry the weight of the pipe and water. Unless another applicable standard or the pipe manufacturer specifies otherwise, horizontal plastic water piping must be supported at intervals no greater than 3 feet. Supports also need to protect the pipe from movement, vibration, road shock, and chassis-related motion.
What You Need to Install PEX in a Mobile Home
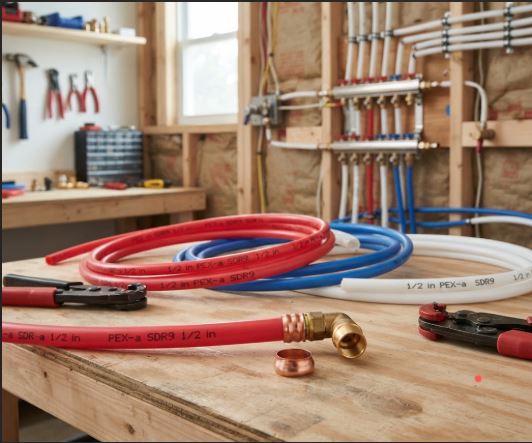
The exact materials depend on your existing plumbing and the PEX connection system you choose. A typical project may require:
- PEX tubing in the correct size
- PEX fittings compatible with the tubing
- PEX-compatible shutoff valves
- A PEX cutter
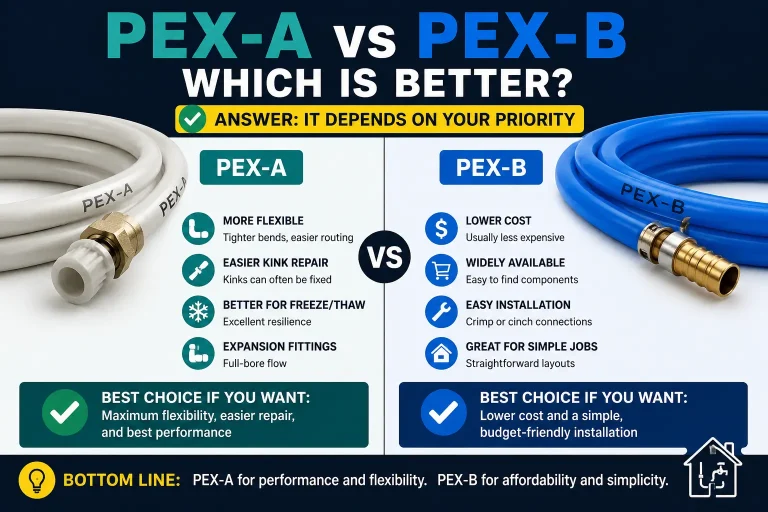
- The correct crimp, clamp, press, or expansion tools for your fitting system
- PEX support clamps or approved hangers
- Pipe insulation for vulnerable cold-water runs
- Threaded adapters where PEX connects to existing fixtures or equipment
- A pressure gauge for testing
- Replacement material for damaged underbelly protection
- Bucket, towels, flashlight, and basic hand tools
Do not mix connection methods just because the fittings look similar. Use the joining method specified by the PEX manufacturer and make sure the fittings are listed for the intended application. HUD’s plumbing standard requires plastic pipe and fittings to be joined using manufacturer-recommended methods or a listed standard.
Step 1: Find the Main Water Shutoff
Before cutting anything, shut off the water supply to the home.
Then open several faucets, including the lowest fixture you can access, to relieve pressure and drain the lines. If the water heater is connected to the system, follow its manufacturer’s instructions before working around its water connections.
Do not start cutting pipe while the system is still pressurized. A small amount of trapped water is normal, but a pressurized line can turn a simple plumbing repair into an indoor swimming lesson.
Step 2: Inspect the Existing Plumbing
Go underneath the home and identify the existing water lines before removing anything.
Look for the main supply line, hot and cold branches, shutoff valves, fittings, crossover connections on multi-section homes, and the points where pipes enter the floor.
Pay particular attention to the condition of the underbelly. If the insulation or belly material has been opened during previous repairs, plan how you will restore it after the plumbing work is complete.
Also identify what type of pipe you are replacing. Older manufactured homes can contain different plumbing materials because sections may have been repaired or remodeled over the years. Do not assume every pipe underneath the home is the same material.
Step 3: Plan the New PEX Layout
Before cutting the old pipe, sketch the plumbing layout.
Mark the water heater, kitchen sink, bathroom fixtures, laundry connections, exterior hose connections, and the main water connection. Then decide where the new PEX will run.
Whenever practical, use long continuous runs and minimize unnecessary fittings. Every fitting creates another connection that could potentially leak, so there is little benefit in turning a simple run into a plumbing version of spaghetti.
For a multi-section manufactured home, pay special attention to the water-line crossover between sections. HUD’s standards specifically recognize connections between sections and require appropriate connectors or fittings for those connections.
Step 4: Choose the Correct PEX Size
Do not automatically replace every line with 1/2-inch PEX simply because 1/2-inch tubing is common.
Pipe sizing needs to account for the number of fixtures supplied and the layout of the water distribution system. The federal manufactured-home standard provides minimum sizing requirements and a sizing procedure based on the number of fixtures served.
Your home’s original plumbing diagram, manufacturer instructions, state plumbing code, and local requirements can also affect the correct size.
The main supply line will often need to be larger than individual fixture branches. If you are replacing the entire water distribution system, size the system as a system rather than choosing every pipe individually.
Step 5: Remove the Old Pipe
Cut out the old plumbing in manageable sections rather than trying to pull an entire system out at once.
When working underneath the home, watch for electrical wiring, structural components, insulation, and other utilities. Do not use plumbing supports or chassis components as convenient places to attach unrelated equipment.
If you are replacing brittle or damaged pipe, remove enough material to reach sound sections. A new fitting attached to a damaged piece of old tubing is not really a new plumbing system. It is an old problem wearing a new hat.
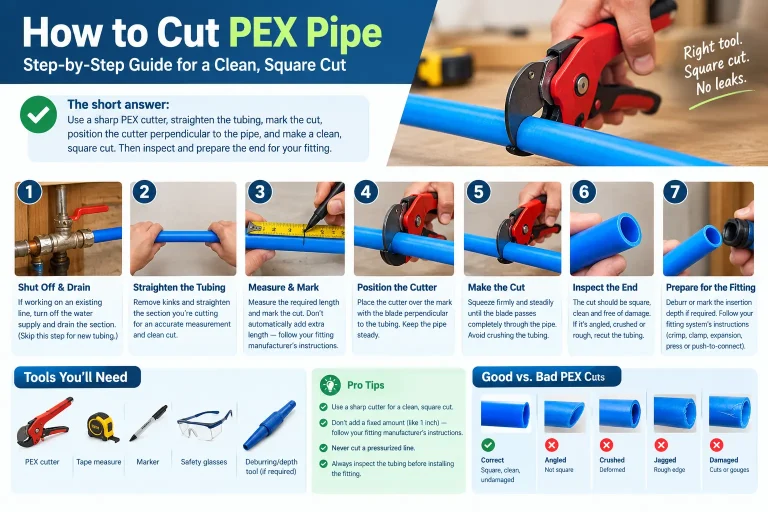
Step 6: Cut the PEX Cleanly
Use a PEX tubing cutter to make a clean, square cut.
The end of the tubing should not be crushed, heavily distorted, or cut at an angle. A poor cut can interfere with proper fitting installation and create a connection that does not seal correctly.
Keep the tubing clean while you work. Dirt, debris, and damaged tubing can cause problems at fittings.
Step 7: Install the PEX Fittings
The exact connection procedure depends on the PEX system.
Crimp fittings, clamp fittings, press fittings, and expansion systems do not all use the same installation process. Follow the instructions for the specific pipe and fitting combination you purchased.
For example, a crimp connection requires the correct crimp ring and tool. An expansion system uses different fittings and a different installation method. Do not improvise because a fitting happens to slide onto the tubing.
HUD requires plastic pipe and fittings in manufactured homes to be installed using the manufacturer’s recommended joining method or a listed standard.
Step 8: Route and Support the PEX Under the Home
This is one of the most important parts of installing PEX in a mobile home.
Keep the tubing aligned and supported instead of allowing long sections to sag underneath the floor.
Under the federal manufactured-home standard, horizontal plastic water piping generally must have support at intervals no greater than 3 feet unless an applicable material standard or pipe manufacturer’s instructions specify otherwise. Supports must not crush, cut, abrade, or distort plastic pipe, and the plumbing must be protected against movement and vibration.
PEX manufacturers can publish more specific support requirements for their products. For example, Uponor’s residential installation guidance lists 32-inch maximum horizontal support spacing for PEX pipe 1 inch and smaller under the referenced plumbing codes. Always check the installation instructions for your specific PEX product and the code adopted where the home is located.
Do not tightly clamp the tubing in a way that prevents the movement allowed by the manufacturer’s instructions. PEX can expand and contract as water temperature changes, so the installation needs to account for that movement.
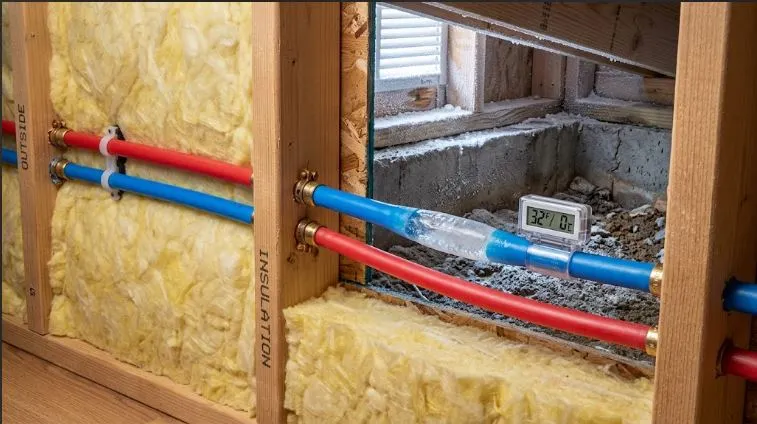
Step 9: Protect PEX From Freezing
Freeze protection deserves special attention in a manufactured home because water lines commonly run beneath the floor.
Inspect the underside of the home for damaged insulation, missing belly material, exposed tubing, and areas where cold air can reach the plumbing.
Insulate vulnerable water lines according to the conditions at your location and the manufacturer’s recommendations. If a heat-tracing or pipe-heating cable is needed, do not install an ordinary heating cable simply because it is available at the hardware store. HUD requirements specify that pipe heating cable used with manufactured homes must be listed for manufactured-home use and installed according to its manufacturer’s instructions.
HUD’s model installation standards also address protection of water connectors and plumbing components from freezing in applicable conditions.
Step 10: Connect the Fixtures and Water Heater
Once the main PEX runs are installed, connect the branches to the fixtures using the appropriate listed fittings and adapters.
Pay particular attention to the water heater. Hot-water piping, temperature and pressure relief arrangements, and other water-heater components have specific requirements. Do not treat the water heater connection like an ordinary sink connection.
Federal manufactured-home standards require plastic water piping and fittings to be listed for hot-water use.
If the home has a pressure-reducing valve, check its setting and condition. HUD’s standard notes that manufactured homes are designed for an inlet water pressure of 80 psi and calls for a pressure-reducing valve where the supply pressure exceeds 80 psi according to the applicable manufacturer instructions.
Step 11: Pressure-Test the New PEX Plumbing
Never bury or close up the plumbing before testing it.
Slowly pressurize the system and inspect every connection. Check the main line, branch connections, valves, fixture connections, crossover, and water-heater connections.
HUD’s manufactured-home installation guidance requires the water supply and drainage systems to be retested at the installation site after field-installed piping has been connected. The applicable manufactured-home installation standards specify testing requirements for the water system.
Your local plumbing authority and the PEX manufacturer’s instructions may specify the exact test method and pressure. Follow those requirements rather than choosing a test pressure from a random internet checklist.
Step 12: Restore the Underbelly and Inspect the Work
After the system passes its leak test, inspect the entire underside of the home again.
Make sure the PEX is supported, fittings are protected, insulation is restored where required, and the underbelly is properly repaired or sealed.
This step matters because the plumbing system is not finished simply because the faucets work. The underside of the home is part of the environment the plumbing has to survive.
Common Mistakes When Installing PEX in a Mobile Home
- Using the wrong fitting system: PEX connection methods are not interchangeable.
- Leaving long unsupported runs: Flexible tubing still needs proper support.
- Ignoring the underbelly: Damaged belly material can expose plumbing and insulation to harsh conditions.
- Forgetting the crossover: Multi-section manufactured homes require careful attention to connections between sections.
- Using the wrong pipe size: Fixture count and system layout matter.
- Skipping the pressure test: A hidden leak under a manufactured home is much harder to find after everything is closed.
- Ignoring freezing conditions: Under-floor plumbing needs appropriate protection in cold climates.
- Attaching supports too tightly: Supports should hold the pipe without damaging or unnecessarily restricting it.
- Mixing old and new plumbing without a plan: Transition fittings must be appropriate for the materials being joined.
Can You Replace All the Plumbing in a Mobile Home With PEX?
In many cases, PEX can be used for a substantial repipe of a manufactured home, provided the product, fittings, installation method, sizing, and local requirements are appropriate.
But a whole-home repipe is different from replacing one leaking section. Before removing the existing system, identify the water heater, fixture branches, main supply, crossover connections, shutoff valves, and under-floor access points.
For major work, check the home’s manufacturer documentation and the requirements of the authority having jurisdiction. HUD specifically advises manufactured-home owners to check with state or local building officials regarding installation requirements.
Final Checklist
Before considering the job complete, make sure you have:
- Shut off and drained the water system.
- Planned the PEX layout before cutting pipe.
- Used appropriately sized PEX.
- Used fittings compatible with the tubing and connection system.
- Made clean, properly prepared cuts.
- Supported the horizontal water lines correctly.
- Protected the tubing from abrasion and physical damage.
- Addressed freezing risks underneath the home.
- Checked crossover connections on multi-section homes.
- Connected fixtures and water-heating equipment according to their instructions.
- Pressure-tested the plumbing before closing the underside.
- Repaired the underbelly and restored insulation where necessary.
- Checked applicable state and local plumbing requirements.
Frequently Asked Questions
What size PEX is commonly used in a mobile home?
There is no single PEX size that should be used for every line in every mobile home. The required size depends on the number of fixtures supplied and the layout of the water distribution system. Federal manufactured-home standards include minimum sizing requirements, so size the system rather than simply using 1/2-inch tubing everywhere.
Can PEX be run underneath a mobile home?
Yes, PEX can be installed underneath a manufactured home when the product and installation meet applicable requirements. The tubing needs proper support and protection from movement, abrasion, freezing, and other site conditions.
How far apart should PEX supports be under a mobile home?
HUD’s manufactured-home plumbing standard generally limits horizontal plastic water-pipe support spacing to 3 feet unless a specific applicable standard or the pipe manufacturer’s instructions specify otherwise. Your PEX manufacturer’s instructions and locally adopted code should also be checked.
Does PEX need to be insulated under a mobile home?
Insulation may be necessary where the plumbing is exposed to freezing conditions or where the manufacturer’s instructions and local requirements call for it. The condition of the home’s underbelly and insulation also matters because both affect the environment around the water lines.
Can I use PEX to replace old polybutylene pipe in a mobile home?
PEX is commonly used in plumbing replacement projects, but the transition from polybutylene to PEX requires the correct transition fitting and installation method. Do not connect the two materials with an improvised fitting. Identify the existing pipe and use a fitting specifically approved for the materials being joined.
Do I need a permit to install PEX in a mobile home?
Permit requirements vary by location and by the type and extent of plumbing work. Before beginning a whole-home repipe, check with the local authority having jurisdiction and review the manufactured home’s installation documentation.
Bottom Line
Learning how to install PEX pipe in a mobile home is not difficult because of the PEX itself. The real challenge is installing the tubing so it works with the unique construction of a manufactured home.
Plan the route before cutting, use the correct fittings, support the tubing properly, protect it from freezing and physical damage, and test the complete system before closing the underside of the home.
Most importantly, do not treat a manufactured home like a site-built house with wheels. The plumbing may look familiar, but the space underneath, chassis movement, factory installation requirements, and exposure to outdoor conditions make the installation details matter.
Sources and References
- U.S. Department of Housing and Urban Development — Manufactured Housing Programs and homeowner resources.
- 24 CFR §3280.608 — Hangers and supports for manufactured-home plumbing systems.
- 24 CFR §3280.609 — Water distribution systems, pipe materials, sizing, water pressure, and installation requirements.
- HUD Model Manufactured Home Installation Standards — water-supply connections, freezing protection, and testing provisions.
- Uponor Residential Plumbing Installation Guide — PEX support and installation guidance.