
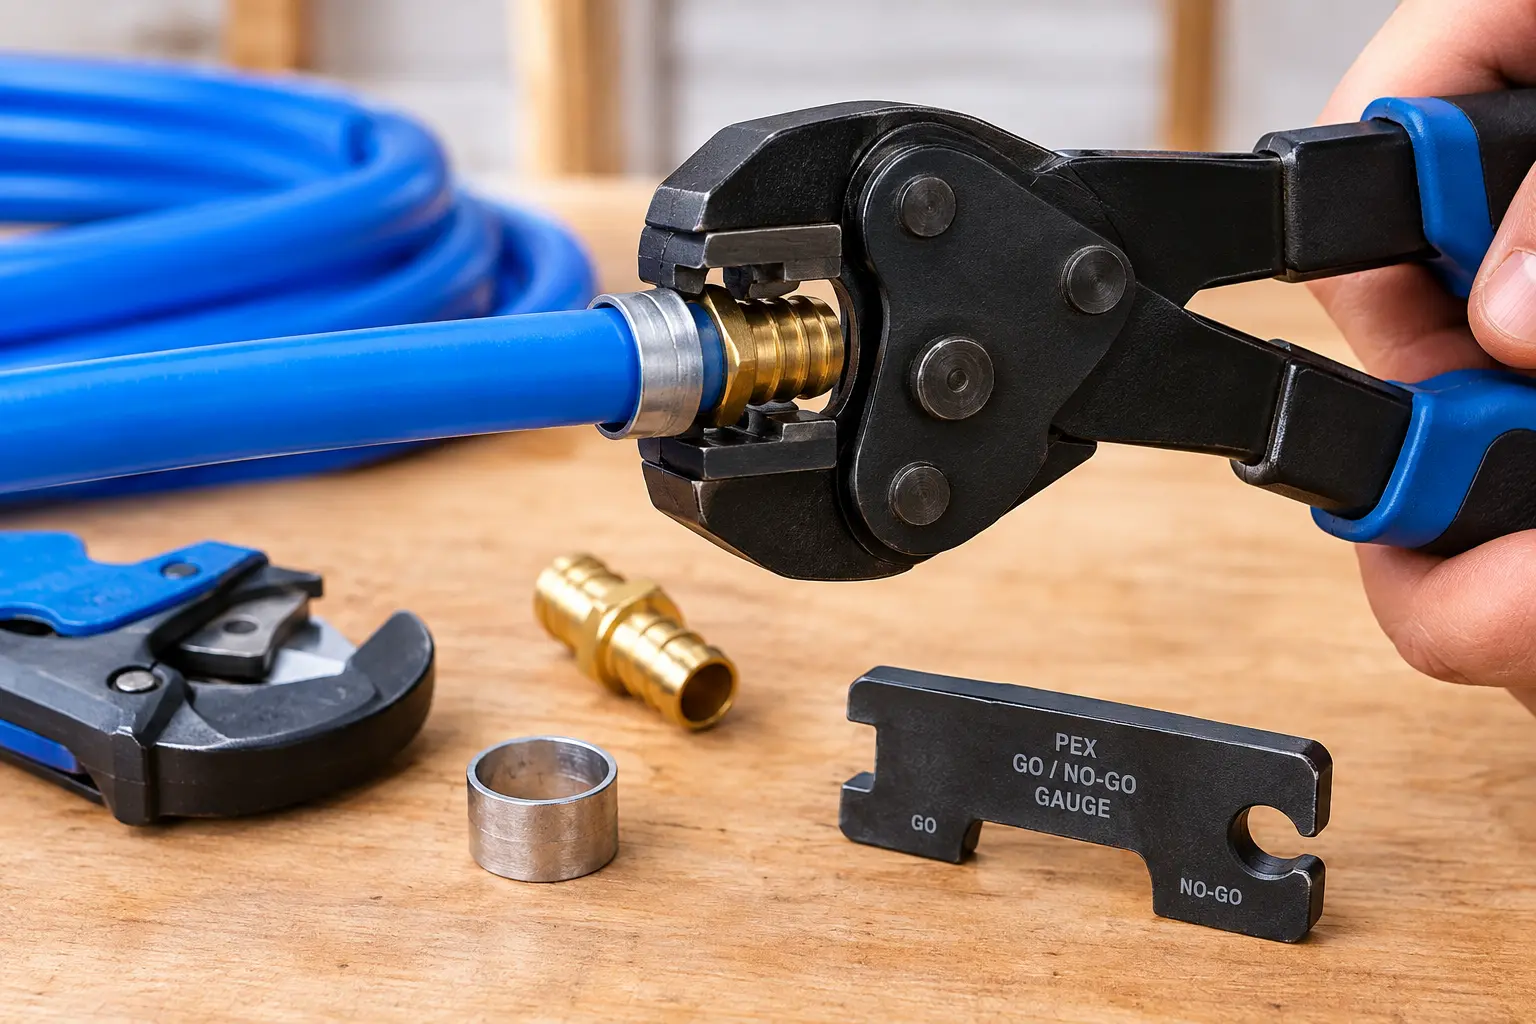
How to Crimp PEX: Step-by-Step Guide to a Leak-Free Connection
Crimping PEX is a straightforward way to connect PEX tubing to compatible barb fittings, but the connection needs more than a hard squeeze from a crimp tool. You need the correct tubing, fitting, crimp ring, and tool, followed by proper ring positioning and a final connection check.
To crimp PEX, cut the tubing square, slide on the correctly sized crimp ring, insert the compatible barb fitting fully, position the ring over the fitting’s barb area, and use the correct-size crimp tool at a 90-degree angle. Close the tool completely according to its instructions, then verify the finished connection with the appropriate Go/No-Go gauge when the crimp system calls for one.
The last step matters. A crimp that looks fine can still fail a gauge check, so don’t treat visual inspection as the only test.
Quick Answer: How to Crimp PEX
The basic process is:
- Shut off the water and relieve pressure in the line.
- Cut the PEX tubing cleanly and squarely.
- Slide the correct crimp ring onto the tubing.
- Insert the compatible barb fitting fully into the PEX.
- Position the ring over the fitting’s barb area.
- Center the correct crimp tool over the ring and keep it square to the tubing.
- Close the tool completely according to the tool manufacturer’s instructions.
- Check the finished crimp with the applicable Go/No-Go gauge.
- If the connection fails inspection, remove it and make a new connection rather than trying to squeeze the same crimp again.
The exact installation details can vary by manufacturer and connection system, so the instructions supplied with your particular tubing, fitting, ring, and tool should take priority.
What You Need to Crimp PEX
Before you start, gather everything you need. Stopping halfway through a plumbing repair because the right ring or gauge is missing is a good way to turn a five-minute job into a hardware-store road trip.
For a conventional PEX crimp connection, you’ll generally need:
- PEX tubing
- A compatible barb-style PEX fitting
- The correctly sized crimp ring
- A PEX cutter
- A correctly sized PEX crimp tool
- A Go/No-Go gauge, when specified for the crimp system
- A crimp-ring removal or decrimping tool if you need to redo a failed connection
The ring and fitting need to match the tubing size and connection system. Don’t assume that a ring that physically slides over the pipe is automatically the right ring for the job.
ASTM F1807 covers metal insert fittings and copper crimp rings used with qualifying SDR9 PEX tubing. The standard describes the connection as compression of the ring around the outside of the tubing, forcing the tubing against the ribs of the insert fitting.
How to Crimp PEX Step by Step
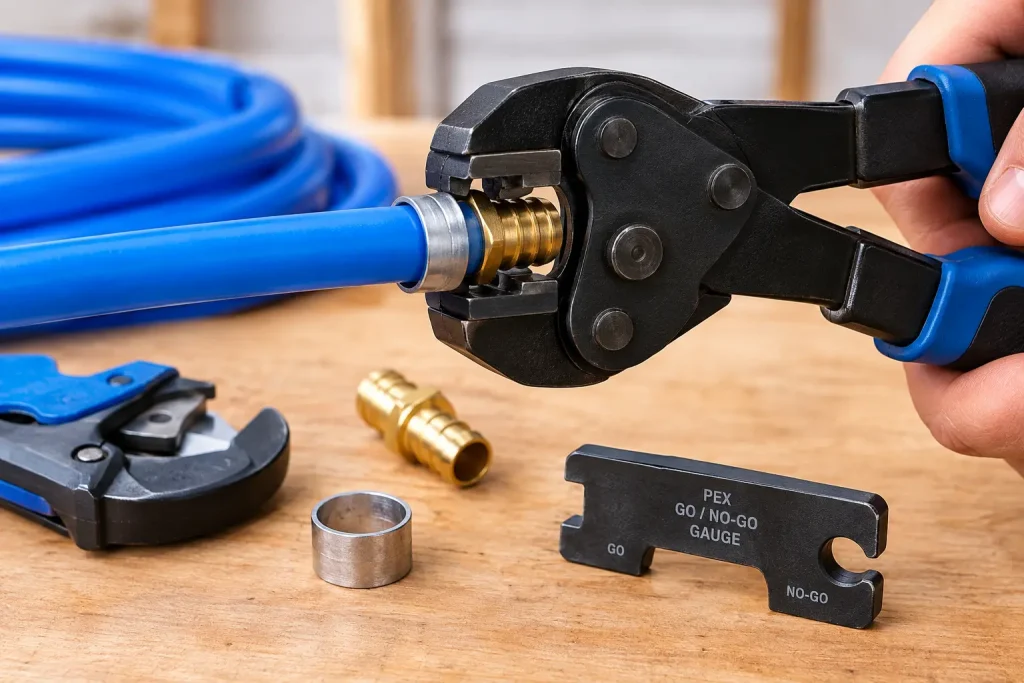
1. Shut Off the Water and Drain the Line
If you’re working on an existing water-supply line, shut off the appropriate water supply before cutting the tubing.
Open a nearby faucet or fixture to relieve pressure and allow the line to drain. Working on a pressurized PEX line is not the time to discover that your shutoff valve has other plans.
Make sure the tubing is reasonably dry and accessible before making the connection.
2. Cut the PEX Square
Use a PEX cutter to make a clean, square cut.
The end should be even rather than angled, crushed, badly scratched, or jagged. Manufacturer installation instructions commonly emphasize a square, clean cut because an irregular tube end can interfere with proper fitting insertion and connection quality.
Hold the cutter perpendicular to the tubing and make one clean cut rather than repeatedly hacking at the pipe.
A good cut gives you a clean starting point for the rest of the connection.
3. Slide the Crimp Ring Onto the PEX
Slide the correctly sized PEX crimp ring onto the tubing before inserting the fitting.
Move the ring far enough back to give yourself room to insert the fitting. Once the fitting is installed, you’ll bring the ring forward into its final position.
The ring must match the connection system you’re using. A crimp ring and a cinch/clamp ring are not interchangeable simply because both are used to secure PEX.
4. Insert the Fitting Fully
Push the compatible barb fitting into the PEX tubing until the tubing reaches the fitting’s shoulder or tube stop, as specified by the fitting manufacturer.
The fitting needs to be fully seated before you position the ring.
Don’t rely on the crimp ring to pull partially inserted tubing onto the fitting. The ring’s job is to compress the tubing around the fitting; it is not a substitute for proper insertion.
5. Position the Crimp Ring Correctly
Now slide the crimp ring toward the fitting.
For many conventional PEX crimp systems, manufacturer instructions position the ring approximately 1/8 to 1/4 inch from the end of the tubing, directly over the fitting’s barb area.
That measurement is common in manufacturer instructions, but don’t treat it as a universal number for every PEX connection system. Check the instructions for your specific fitting and ring.
The important idea is simple: the ring needs to sit over the part of the fitting designed to be compressed against the tubing.
6. Position the PEX Crimp Tool
Open the jaws of the correct-size PEX crimp tool and place them over the center of the crimp ring.
Keep the tool properly aligned with the ring. Manufacturer instructions commonly call for the tool to remain at approximately 90 degrees to the tubing.
A crooked tool can produce an improperly formed connection. Center the jaws over the ring rather than catching only part of the ring with the tool.
If your particular tool has a calibration procedure, complete the required calibration or calibration check before making connections.
7. Make the Crimp
Close the crimp tool completely according to its instructions.
Don’t treat the job like a strength contest. More force is not automatically better, and squeezing a failed connection a second time is not a proper repair.
Some manufacturer instructions specifically state that the crimp should be made once. If the finished connection fails its required inspection, cut it out and start again with the appropriate components and procedure.
A proper PEX crimp comes from the correct combination of tubing, fitting, ring, tool, positioning, and compression—not from simply squeezing harder.
8. Check the Finished Connection
This is the step that separates “it looks okay” from “I’ve actually checked the connection.”
For applicable crimp systems, use the supplied Go/No-Go gauge according to the tool or fitting manufacturer’s instructions.
For example, SharkBite’s crimp instructions state that the Go side should pass over the crimp while the No-Go side should not pass over it. Other systems may provide different checking instructions, so use the gauge supplied for your particular system.
If the connection fails the applicable gauge check, don’t install it and hope for the best. Correct the connection before putting the line back into service.
What Does a Proper PEX Crimp Look Like?
A good PEX crimp starts with proper assembly before the tool ever touches the ring.
Look for:
- Tubing fully seated on the fitting
- Crimp ring positioned correctly over the fitting’s barb area
- Ring compressed evenly
- Crimp tool properly aligned during installation
- No obvious damage to the tubing, ring, or fitting
- A passing Go/No-Go check when that gauge applies
Here’s a simple way to think about it:
| Good PEX Crimp | Problematic PEX Crimp |
|---|---|
| Tubing fully seated | Tubing not fully seated |
| Ring correctly positioned | Ring positioned incorrectly |
| Even compression | Uneven or improper compression |
| Correct ring and tool combination | Wrong or incompatible equipment |
| Passes applicable gauge check | Fails applicable gauge check |
Don’t judge a crimp solely by appearance. The connection should be checked using the procedure specified for the particular crimp system.
How to Use a PEX Go/No-Go Gauge
A Go/No-Go gauge helps determine whether a crimp was formed within the acceptable range specified by the applicable connection system.
For a typical crimp system, the gauge has two checking areas:
- GO: should pass over the crimp as specified.
- NO-GO: should not pass over the crimp.
The exact procedure matters. Some manufacturer instructions specify that the gauge should be placed straight over the crimp rather than approached from the side. Follow the instructions supplied with your gauge.
The gauge also isn’t a replacement for proper assembly. It can’t fix a fitting that wasn’t fully inserted, damaged tubing, an incorrect ring, or an incompatible tool.
Think of it as a verification step—not a magic wand.
Common PEX Crimping Mistakes
Most bad PEX crimps aren’t mysterious. They usually come from one of a handful of installation mistakes.
1. Cutting the Tubing Crooked
An angled or damaged cut can make proper fitting insertion more difficult.
2. Using the Wrong Ring Size
The crimp ring must match the tubing and fitting system. Don’t mix components based only on appearance.
3. Using the Wrong Tool
A crimp tool must be designed for the ring and connection system being installed.
4. Not Fully Inserting the Fitting
The fitting needs to be seated according to its installation instructions before crimping.
5. Positioning the Ring Incorrectly
The ring should sit over the appropriate fitting barb area rather than being placed randomly along the tubing.
6. Holding the Tool at an Angle
Keep the tool properly aligned and centered over the ring.
7. Ignoring Tool Calibration
Some PEX crimp tools require calibration or adjustment. An improperly adjusted tool can produce a connection that does not meet the applicable checking requirements.
8. Skipping the Gauge Check
If your crimp system calls for a Go/No-Go gauge, use it.
9. Reusing a Damaged Connection
A failed crimp should be removed and remade using the applicable procedure. Don’t try to hide a bad connection under another crimp.
10. Trying to Fix Everything by Squeezing Harder
PEX is forgiving. Your crimp tool, however, still expects you to follow the rules.
PEX Crimp Troubleshooting
| Problem | Possible Cause | Practical Fix |
|---|---|---|
| Crimp fails the gauge check | Incorrect crimp, tool setup, ring positioning, or component mismatch | Stop and remake the connection according to the applicable instructions |
| Tubing isn’t fully seated | Fitting wasn’t pushed completely into the tubing | Cut and remake the connection if necessary |
| Ring looks crooked | Tool or ring wasn’t properly aligned | Remove and remake the connection |
| Connection leaks | Installation problem, damaged component, or incompatible components | Shut off water, inspect the connection, and remake it as required |
| Tool doesn’t form the expected crimp | Incorrect tool, size, or calibration | Check tool compatibility and calibration instructions |
| Crimp ring is damaged | Incorrect installation or tool issue | Replace the affected connection/components as appropriate |
| No-Go portion passes when it shouldn’t | Connection does not meet the gauge requirement | Remove and remake the connection |
This table is a troubleshooting guide, not a substitute for the manufacturer’s installation instructions.
What to Do If a PEX Crimp Fails
If a crimp fails its required inspection, stop before restoring the line to service.
First, shut off the water and relieve pressure. Then remove the failed connection using the procedure appropriate for the fitting and ring system.
Some manufacturer instructions recommend cutting the tubing close to the fitting to minimize material loss. A dedicated crimp-ring removal tool can also be used with compatible rings and fittings.
After removing the failed connection:
- Inspect the fitting for damage.
- Inspect the remaining tubing for cuts, scratches, or deformation.
- Replace damaged components as necessary.
- Make a fresh connection using a new appropriate ring.
- Position the ring correctly.
- Make the crimp according to the tool instructions.
- Perform the applicable gauge check.
- Restore water pressure and inspect the connection for leaks.
Don’t simply add another crimp to the same failed ring. If the connection didn’t meet the installation requirements, remake it properly.
Why Is My PEX Crimp Leaking?
A leaking PEX crimp can have several possible causes, so don’t assume the ring itself is automatically the problem.
Common installation-related possibilities include:
- Tubing wasn’t fully inserted onto the fitting
- Crimp ring was incorrectly positioned
- Wrong-size ring or fitting was used
- Tool wasn’t appropriate for the connection system
- Tool was not used or calibrated correctly
- Tubing was damaged before installation
- Fitting or ring was damaged
- The connection did not meet the applicable gauge requirement
Start by shutting off the water and inspecting the connection. If the installation doesn’t match the manufacturer’s requirements, remake the connection rather than attempting to compensate with additional force.
Can You Crimp PEX-A, PEX-B and PEX-C?
Yes, some PEX-A, PEX-B, and PEX-C tubing can be used with crimp-style connection systems, but the important word is some.
The PEX type alone does not determine which connection method you should use. Compatibility depends on the specific tubing, fitting, ring, tool, and manufacturer’s instructions.
For example, some PEX-A products are specifically listed by their manufacturer for ASTM F1807 crimp connections as well as other systems. That doesn’t mean every PEX-A product should automatically be paired with every crimp fitting.
ASTM F1807 covers metal insert fittings and copper crimp rings for qualifying PEX tubing. ASTM F1960, meanwhile, relates to expansion-style connections, which use a different connection method.
So if you’re wondering whether you can crimp PEX-A or PEX-B, don’t choose the connection method based solely on the letter after “PEX.” Check the product documentation and make sure the tubing, fitting, ring, and tool form a compatible system.
If you’re comparing PEX-A and PEX-B more broadly, see our guide to [PEX-A vs. PEX-B] for the differences that matter when selecting PEX.
PEX Crimp vs. Clamp: What’s the Difference?
Crimp and clamp connections both secure PEX tubing to compatible barb fittings, but they use different retaining components and tools.
| Connection Type | Retaining Component | Tool |
|---|---|---|
| PEX crimp | Copper crimp ring or applicable crimp ring | PEX crimp tool |
| PEX clamp/cinch | Stainless-steel clamp ring with ear/tab | PEX clamp/cinch tool |
The terms sometimes get mixed together because both methods are used on PEX barb fittings. But the tools and rings are not automatically interchangeable.
A crimp tool is designed to compress the appropriate crimp ring. A cinch or clamp tool is designed to compress the appropriate clamp ring.
Don’t use one tool simply because it looks like it can squeeze the other type of ring.
Also remember that the verification process can differ. A crimp system may use a Go/No-Go gauge, while a particular clamp system may use visual inspection and tool calibration instead.
Does a PEX Crimp Tool Need Calibration?
It depends on the tool.
Some PEX crimp tools have specific calibration procedures or checks. Others are designed differently. The important point is to follow the instructions for the exact tool you’re using.
SharkBite, for example, provides a specific calibration procedure for its copper crimp tool and uses a Go/No-Go gauge as part of the checking process.
If your tool is adjustable or requires calibration, don’t guess at the setting. An incorrectly calibrated tool can affect the finished connection.
For a new project, it’s also sensible to understand how your particular tool should be checked before making connections in an inaccessible location.
How to Remove a Bad PEX Crimp
A bad PEX crimp should be removed rather than covered up.
For some systems, you can cut the tubing close to the fitting and use a dedicated decrimping tool to split the crimp ring. The exact process depends on the ring and fitting system.
When removing a crimp, take care not to damage the fitting or the remaining tubing.
After removal, inspect everything before deciding whether a component can be reused. If the tubing has been damaged or the fitting is compromised, replace the affected component.
When in doubt, follow the fitting manufacturer’s removal and reuse instructions.
Final Takeaway
Learning how to crimp PEX is mostly about getting a few fundamentals right: make a clean square cut, use compatible components, fully seat the fitting, position the ring correctly, keep the crimp tool aligned, and complete the required connection check.
The most important habit is simple: don’t stop when the crimp looks good. Verify it.
A proper PEX crimp isn’t created by brute force. It’s created by the right tubing, fitting, ring, tool, positioning, and installation procedure working together.
For larger PEX projects, understanding the fittings and tubing you are working with becomes just as important as learning the crimp itself. If you’re still getting familiar with PEX, our guides on what PEX is, PEX pipe fittings, [PEX-A vs. PEX-B], and [PEX vs. copper] can help you understand the bigger picture.
For major repiping work or concealed water-supply installations, follow applicable plumbing-code requirements and the manufacturer’s instructions, and consider professional help when the project goes beyond a straightforward repair.
Frequently Asked Questions
How tight should a PEX crimp be?
A PEX crimp should be compressed according to the requirements of the specific ring, fitting, and crimp tool system. Don’t judge tightness by how hard you can squeeze the handles. Use the correct tool and the applicable verification method.
How far should a PEX crimp ring be from the end of the pipe?
Many manufacturer instructions specify approximately 1/8 to 1/4 inch from the tubing end, with the ring positioned over the fitting’s barb area. Always follow the instructions for your specific connection system.
How do I know if my PEX crimp is good?
Check that the tubing is fully seated, the ring is correctly positioned and evenly compressed, and the connection passes the applicable Go/No-Go gauge procedure. Also inspect the connection after restoring water pressure.
Can you crimp PEX-A?
Some PEX-A tubing products are approved for crimp-style connections. Compatibility depends on the specific tubing and connection system, so check the manufacturer’s documentation.
Can you crimp PEX-B?
PEX-B can be used with appropriate crimp-style systems when the tubing, fitting, ring, and tool are compatible. Follow the product manufacturer’s installation requirements.
Can you crimp PEX-C?
Some PEX-C tubing can also be used with compatible crimp systems. The tubing designation alone should not be used to determine compatibility.
Can you reuse a PEX crimp ring?
A crimp ring that has already been crimped should not simply be treated as a new ring. When remaking a failed connection, use the procedure and replacement components specified by the fitting or ring manufacturer.
Why is my PEX crimp leaking?
Possible causes include incomplete fitting insertion, incorrect ring placement, damaged tubing, an incompatible component combination, improper tool use, or a connection that failed the applicable inspection. Shut off the water and remake the connection if it does not meet the installation requirements.
What happens if a PEX crimp fails the Go/No-Go gauge?
Don’t leave the connection in service. Remove the failed connection according to the applicable procedure, inspect the components, and make a new connection.
Can you use a cinch tool on a crimp ring?
No. A cinch/clamp tool and a crimp tool are designed for their respective connection systems. Use the tool specified for the ring and fitting you’re installing.
Does a PEX crimp tool need calibration?
Some tools require calibration or adjustment, while others have different designs. Follow the manufacturer’s instructions for your exact tool.