How to Connect PEX to Copper: 4 Reliable Methods
The easiest way to connect PEX to copper is usually a push-to-connect transition fitting. It requires no soldering, crimping, or special PEX tools, making it a practical choice for many repairs and smaller plumbing projects.
For a permanent traditional installation, you can solder a copper-to-PEX adapter onto the copper pipe and then connect the PEX using a compatible crimp, clamp, or expansion fitting. Press transition fittings are another option when you want a solder-free connection and have the appropriate press tool.
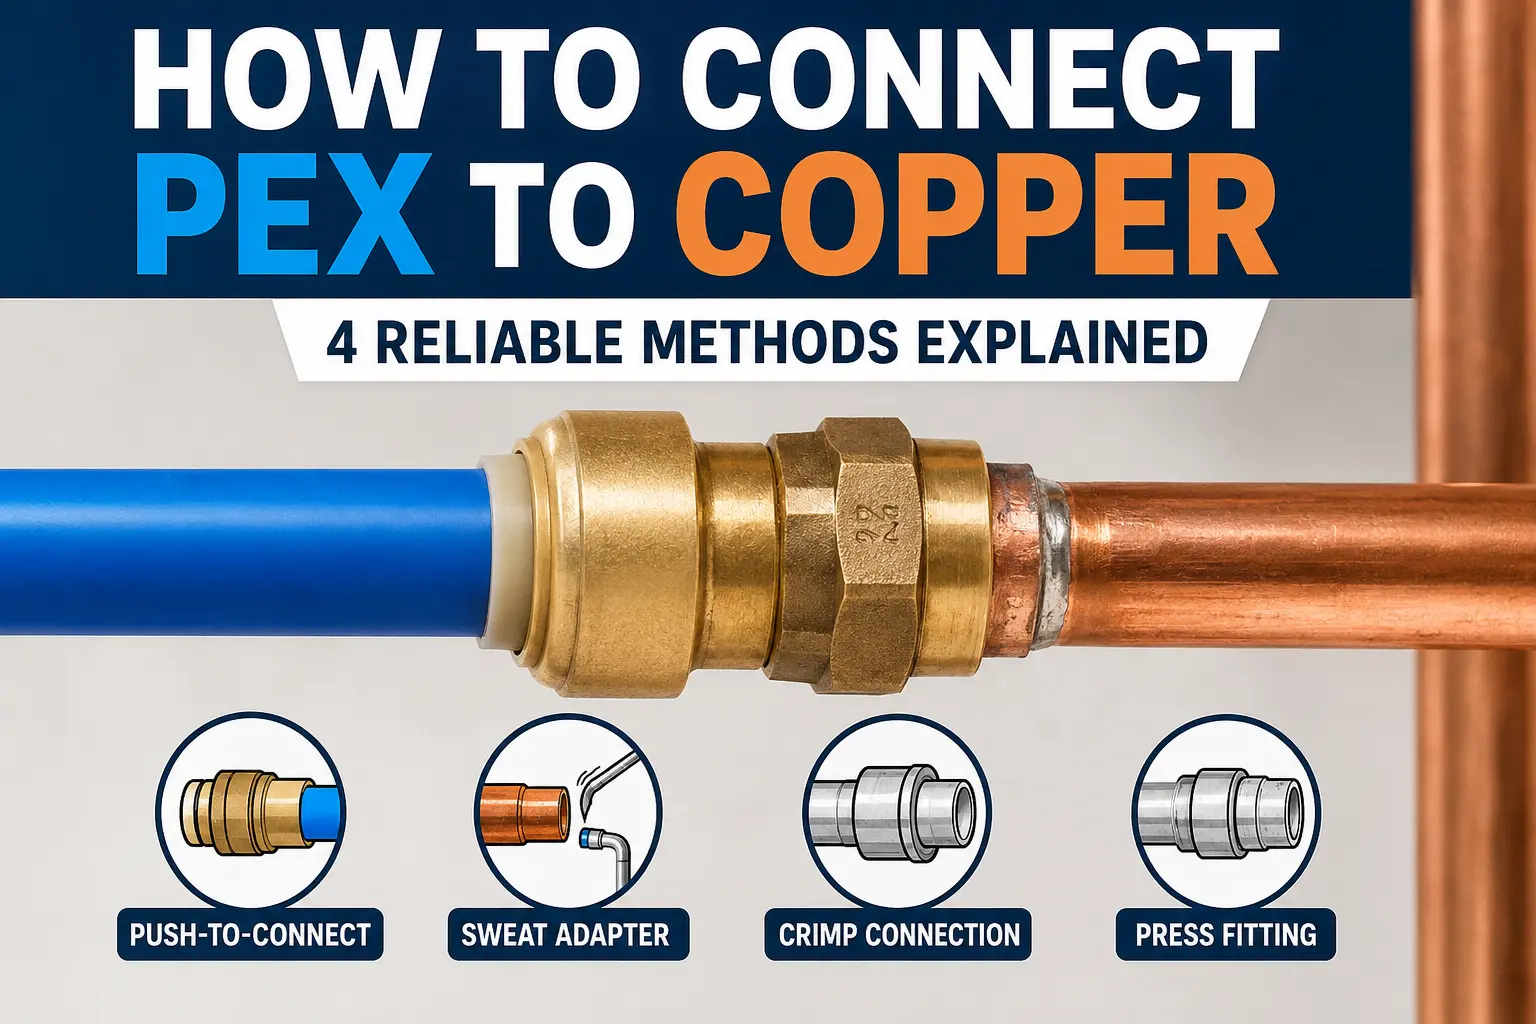
The four common ways to connect PEX to copper are:
- Push-to-connect transition fitting — fastest and easiest for many repairs.
- Sweat (soldered) copper-to-PEX adapter — a traditional, durable connection.
- Sweat adapter with a PEX crimp or clamp connection — combines a soldered copper connection with a mechanical PEX connection.
- Press transition fitting — a professional solder-free option that uses a press tool.
There is no single method that is best for every installation. The right choice depends on PEX type, pipe size, installation location, available tools, connection requirements, and local plumbing code.
Before making the connection, verify that the fitting is designed for your specific PEX tubing and copper pipe size and follow the fitting manufacturer’s installation instructions. For concealed connections, major plumbing work, or locations subject to code requirements, check your local plumbing code before proceeding.
At a Glance
| Method | Soldering Required? | Special Tool? | DIY Difficulty | Best For | Removable? | Main Advantage |
|---|---|---|---|---|---|---|
| Push-to-connect fitting | No | No | Easy | Fast repairs, tight or wet spaces | Yes, with a release tool | No flame, no special tool |
| Sweat copper-to-PEX adapter | Yes | Torch, tubing cutter | Moderate | Permanent transitions in accessible areas | No | Familiar, low-cost fitting |
| Sweat adapter + PEX crimp/clamp | Yes (copper side only) | Torch, crimp or clamp tool | Moderate | Permanent transitions where a crimp system is already in use | No | Strong, code-accepted mechanical joint |
| Press transition fitting | No | Press tool (specific jaw) | Moderate | Pros with press tools, concealed/finished spaces | No | Fast, no flame, reliable seal |
Tool cost and DIY suitability vary quite a bit by method, they are covered in more detail below.
Can You Connect PEX to Copper?
Yes. Transitioning between PEX and copper is one of the most common jobs in residential plumbing, whether you’re repairing a section of old copper, extending a line, or doing a partial repipe.
What you can’t do is push, glue, or thread PEX straight onto bare copper pipe and expect a sealed, code-compliant joint. The two materials have different diameters, wall properties, and connection mechanics, so the transition always happens through a fitting engineered for that purpose — usually copper (or brass) on one end and a PEX-specific connection on the other.
The installation procedure changes depending on the connection system:
- Some fittings use an internal O-ring and grab ring (push-to-connect).
- Some require a soldered sweat joint on the copper side.
- Some require a crimp ring, cinch ring, or expansion collar on the PEX side.
- Some use a mechanical press connection made with a powered press tool.
Because of these differences, always follow the specific fitting manufacturer’s instructions rather than assuming every “PEX to copper” fitting installs the same way.
What You Need to Connect PEX to Copper
Before you start, gather what the job actually requires. Exact tools depend on your chosen method, but most PEX-to-copper jobs draw from this list:
- PEX-to-copper transition fitting rated for your pipe size and PEX type
- Tubing cutter for a clean, square cut on the copper
- PEX cutter (ratchet-style or scissor-style) for a clean cut on the PEX
- Deburring tool or abrasive cloth to clean the cut edge of the copper
- Emery cloth or sand cloth to clean and brighten the copper surface
- Method-specific tool: crimp tool, cinch tool, expansion tool, or press tool if your fitting requires one
- Torch, flux, and lead-free solder if you’re making a soldered connection
- Bucket, towel, and a way to shut off and drain the line
- Go/no-go gauge if your crimp or cinch system requires one to verify the ring
Before you start:
- Shut off the water supply to the section you’re working on.
- Open a nearby faucet to relieve pressure and drain remaining water.
- Confirm the fitting you bought is rated for the correct nominal pipe size and PEX type.
4 Ways to Connect PEX to Copper
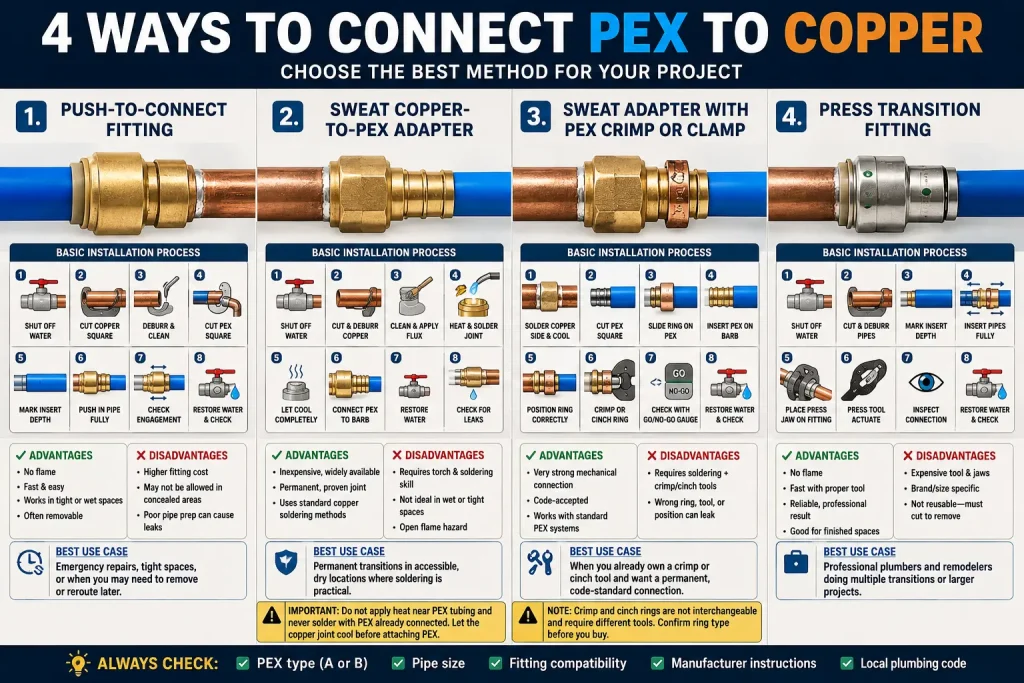
1. Push-to-Connect Fitting
What it is: A push-to-connect (also called push-fit) fitting has a copper or brass body with a stainless steel grab ring and an internal O-ring on the PEX side. You prepare the pipe ends and simply push them into the fitting — no torch, no crimping.
Tools needed: Tubing cutter, deburring tool, PEX cutter. No powered or crimping tool required.
Basic installation process:
- Shut off and drain the line.
- Cut the copper pipe square with a tubing cutter.
- Deburr and lightly clean the cut end of the copper — remove burrs, scale, and any pitting.
- Cut the PEX tubing square with a PEX-specific cutter.
- Mark the required insertion depth on both pipe ends if the manufacturer specifies one.
- Push each pipe into its side of the fitting until it seats fully against the internal stop.
- Give a light tug on both sides to confirm engagement.
- Restore water supply slowly and check the joint closely for drips.
Advantages: No flame, works in wet or tight spaces, fast, low skill barrier, many versions are removable with a release clip or tool.
Disadvantages: Generally costs more per fitting than a plain sweat adapter, some jurisdictions or property types restrict use in concealed locations, and a poorly prepped pipe surface (scratches, pitting, or leftover burrs) can prevent the internal O-ring from sealing.
Best use case: Emergency repairs, jobs where soldering isn’t practical or safe, and situations where you may need to remove or reroute the connection later.
Code and manufacturer notes: Some manufacturers limit push-to-connect fittings to accessible locations, while others rate certain models for concealed use. Check the manufacturer’s instructions for the exact fitting you’re using, and confirm what your local plumbing code allows for concealed installations.
2. Sweat Copper-to-PEX Adapter
What it is: A traditional soldered (sweat) fitting on the copper side, transitioning to a barbed or threaded PEX connection on the other end.
Tools needed: Torch, flux, lead-free solder, tubing cutter, emery cloth, and a PEX cutter. If the PEX side uses a barb-and-ring system, you’ll also need a crimp or cinch tool (see Method 3).
Basic installation process:
- Shut off and drain the line.
- Cut the copper pipe square and deburr the cut edge.
- Clean the outside of the copper pipe and the inside of the fitting socket with emery cloth until bright.
- Apply flux evenly to both surfaces.
- Assemble the joint, apply heat with the torch, and feed solder around the joint until it draws in evenly.
- Let the connection cool completely before touching the PEX side.
- Connect the PEX tubing to the fitting’s barb or threaded end according to that connection system’s instructions.
- Restore water and inspect the joint under pressure.
Advantages: Uses familiar, inexpensive fittings that most plumbers already stock, and produces a permanent, well-understood joint on the copper side.
Disadvantages: Requires an open flame, so it isn’t suitable near flammable materials, in wet areas, or where a torch simply can’t be maneuvered. Soldering skill affects joint quality.
Best use case: Permanent transitions in accessible, dry locations where you’re comfortable soldering or a professional is doing the work.
Important: Never apply the torch anywhere near the PEX tubing itself, and never solder with PEX already connected to the fitting. Heat will damage or deform PEX. Let the copper joint cool fully — allow it to reach a safe handling temperature — before attaching PEX.
3. Sweat Adapter With PEX Crimp or Clamp
What it is: The copper side of this transition is soldered exactly as in Method 2, but the PEX side terminates in a barb, over which the PEX tubing is slid and then secured with a copper crimp ring (using a crimp tool) or a stainless steel clamp/cinch ring (using a cinch tool).
Tools needed: Torch, flux, solder, tubing cutter, PEX cutter, and either a crimp tool or a cinch tool matched to your ring type. A go/no-go gauge is used after crimping to confirm a correctly sized ring.
Basic installation process:
- Solder the copper side of the adapter as described in Method 2 and let it cool.
- Cut the PEX tubing square.
- Slide a crimp ring or cinch ring onto the PEX tubing before inserting the barb.
- Push the PEX tubing fully onto the barb fitting until it seats against the fitting’s shoulder.
- Position the ring at the correct distance from the tubing end, per the manufacturer’s spec (commonly around 1/8 to 1/4 inch, but this varies — confirm with the fitting instructions).
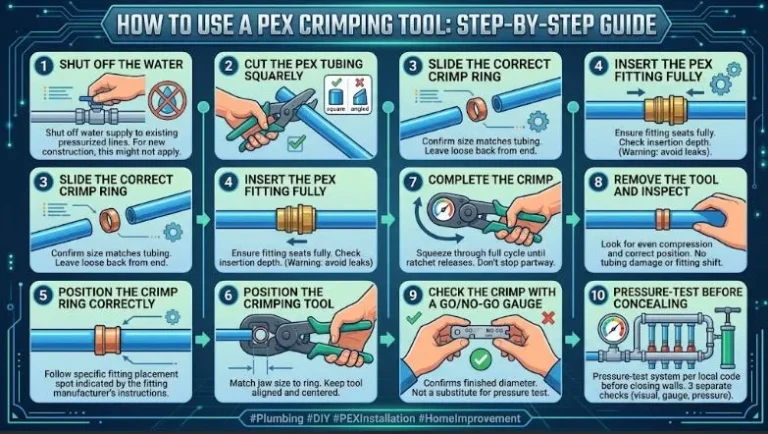
- Crimp or cinch the ring using the correct tool for that ring type.
- Check the crimped ring with a go/no-go gauge if the system requires one.
- Restore water and check for leaks at both the sweat joint and the crimp/cinch connection.
Advantages: Produces a strong, code-accepted mechanical joint on the PEX side and lets you standardize on one connection system (crimp or cinch) throughout the rest of the job.
Disadvantages: Requires two separate skill sets — soldering and crimping/cinching — plus two different tools. A mismatched ring type, wrong crimp tool, or incorrect ring position is a common failure point.
Best use case: Homeowners or plumbers who already own a crimp or cinch tool and want a permanent, code-standard PEX connection paired to a soldered copper transition.
A note on compatibility: Crimp rings and cinch (clamp) rings are not interchangeable, and they require different tools. Confirm which ring type your fitting is designed for before you buy a tool.
4. Press Transition Fitting
What it is: A press fitting uses an internal O-ring, similar in concept to push-to-connect, but the seal is made mechanically with a powered or manual press tool fitted with the correct jaw, rather than by hand pressure alone.
Tools needed: A press tool with a jaw sized and profiled for your specific fitting brand and pipe size. This is a significant tool investment, so it’s most common among working plumbers rather than one-off DIYers.
Basic installation process:
- Shut off and drain the line.
- Cut the copper and PEX pipe ends square and deburr as needed.
- Mark insertion depth if specified.
- Insert both pipe ends fully into the fitting.
- Fit the correct press jaw onto the fitting and actuate the press tool to compress the fitting around the O-ring.
- Inspect the pressed connection visually per the manufacturer’s guidance.
- Restore water and pressure-test the joint.
Advantages: No open flame, fast once you own the tool, and produces a reliable, professional-grade seal that’s well suited to finished or concealed spaces.
Disadvantages: The press tool and jaws are expensive, brand- and size-specific, and not a practical purchase for a single repair. Once pressed, the fitting is not designed to be reused or removed without cutting it out.
Best use case: Licensed plumbers and remodelers doing multiple transitions, or larger jobs where the press tool investment pays off across several fittings.
How to Connect PEX to Copper Without Soldering
If you don’t want to use a torch — because of accessibility, safety, or simple preference — a push-to-connect fitting is the standard solder-free option. A press fitting is also solder-free, but it requires a dedicated press tool that most homeowners don’t own.
Here’s the full solder-free process using a push-to-connect fitting:
- Shut off the water at the main or the nearest isolation valve.
- Drain and depressurize the line by opening a faucet downstream of your work area.
- Cut the copper squarely using a tubing cutter — an angled cut will prevent a proper seal.
- Deburr and ream the cut end to remove the sharp inner and outer edge left by the cutter.
- Clean and inspect the copper surface where the fitting’s O-ring will seal. Remove any oxidation, scratches, or old solder residue with emery cloth.
- Check for pipe damage — dents, deep scratches, or pitting in the sealing zone can prevent a watertight seal and may mean you need to cut back further to sound pipe.
- Measure and mark the insertion depth if your fitting specifies one (many push-fit brands print depth marks directly on the fitting or provide a marking tool).
- Insert the copper end into the fitting, pushing until it stops against the internal shoulder.
- Cut and insert the PEX tubing to the same required depth on the opposite side.
- Verify the connection with a firm tug on each pipe to confirm the grab ring has engaged.
- Restore water slowly, watching the joint as pressure builds.
- Check carefully for leaks at the fitting and anywhere you disturbed nearby joints, and recheck again after a few hours.
Not every push-fit product installs identically — some require a depth-marking tool, some don’t, and insertion-depth specs vary by brand and size. Always follow the exact instructions printed with the fitting you purchased.
Can You Use SharkBite to Connect PEX to Copper?
SharkBite is one well-known brand of push-to-connect fitting, and it’s often used as an example of this category — but it isn’t the only manufacturer making push-fit PEX-to-copper transitions.
Push-to-connect fittings in general, including SharkBite-style fittings, work by:
- Compatibility — most push-fit brands are designed to accept copper, CPVC, and PEX (PEX-A and PEX-B) in the same fitting body, but you should confirm compatibility with your specific tubing type.
- Pipe preparation — the copper or PEX must be cut square, deburred, and free of deep scratches in the sealing zone, exactly as described above.
- Insertion — both pipe ends are pushed into the fitting until they seat fully; no crimping or soldering is involved.
- Accessibility — because no tool is required to make the connection, these fittings work well in tight crawlspaces or behind fixtures where a torch or press tool can’t easily reach.
- Removal — many push-fit fittings can be disconnected using a dedicated release clip or removal tool that depresses the grab ring, though this varies by product line.
- Limitations — as with any push-fit connection, a poorly prepared pipe surface, an out-of-round pipe end, or an unsupported/over-flexed joint can lead to a leak. Some local codes or property insurers restrict push-fit connections in concealed walls or ceilings.
Always follow the manufacturer’s installation instructions for the specific fitting you buy, and don’t assume every push-to-connect brand has identical depth marks, pressure ratings, or approved applications.
For background on how PEX fittings are categorized more broadly — including barb, crimp, and push-fit styles — see PlumbJournal’s guide to PEX pipe fittings.
Can You Connect PEX-A or PEX-B to Copper?
Yes, both PEX-A and PEX-B tubing can be transitioned to copper — but the fitting and connection method must be compatible with the specific tubing type you’re using.
- PEX-A is commonly paired with expansion-style fittings, where a special expansion tool stretches the tubing end over a fitting that then contracts back to grip it. PEX-A can also be used with crimp or cinch systems and with many push-to-connect and press fittings, depending on the manufacturer.
- PEX-B is commonly paired with crimp-ring or cinch-ring (clamp) systems, and is also widely compatible with push-to-connect and press fittings.
The key point: don’t assume every PEX fitting works with every PEX connection method. An expansion fitting is designed around PEX-A’s memory characteristics and generally isn’t interchangeable with a crimp-style barb fitting. Always match the fitting to both the tubing type and the connection method it’s engineered for, and follow the manufacturer’s compatibility chart.
If you’re still deciding between tubing types for a project, PlumbJournal’s comparison of PEX-A vs. PEX-B breaks down how the two differ in flexibility, fitting systems, and typical use cases.
What Size Fitting Do You Need?
PEX and copper are both described using nominal sizes — 1/2 inch, 3/4 inch, 1 inch, and so on — but nominal size doesn’t refer to a single exact outside or inside diameter across all products. Actual copper outside diameter, PEX outside diameter, and PEX wall thickness (which varies by PEX type and pressure rating) can all differ slightly between products that share the same “1/2-inch” label.
That means seeing two pipes both marked “1/2 inch” does not automatically guarantee that any fitting will connect them correctly. To size a transition fitting correctly:
- Confirm the nominal size of your existing copper pipe.
- Confirm the nominal size and PEX type (A or B) of the tubing you’re installing.
- Choose a fitting explicitly rated for that pipe size and PEX type combination.
- Don’t mix nominal sizes (for example, forcing a 1/2-inch fitting onto 3/4-inch tubing) even if the parts appear to physically fit together.
Sizes typically covered by standard transition fittings include:
- 1/2-inch PEX to 1/2-inch copper
- 3/4-inch PEX to 3/4-inch copper
- 1-inch PEX to 1-inch copper
When in doubt, bring the old fitting or a short offcut of your existing pipe to the supply store so you can match it against the new fitting before buying.
How to Connect 1/2-Inch PEX to 1/2-Inch Copper
This is the most common residential transition, typically used on branch lines to fixtures. The process follows the same steps outlined above, scaled to 1/2-inch pipe:
- Shut off and drain the 1/2-inch line.
- Cut the copper square with a 1/2-inch-capable tubing cutter.
- Deburr the cut edge and clean the outer surface with emery cloth.
- Cut the PEX square with a PEX cutter sized for 1/2-inch tubing.
- Choose your connection method — push-to-connect, sweat, sweat-plus-crimp/cinch, or press — based on your tools and the job’s accessibility.
- Prepare and make the connection following that method’s specific steps (see the sections above).
- Restore water slowly and check the new joint closely, along with any other joints you disturbed while working.
Because 1/2-inch is the most common size, it’s also the size where the widest variety of fitting brands and connection types is available — giving you the most flexibility to match a method to your tools and skill level.
Why Is My PEX-to-Copper Connection Leaking?
A leaking transition almost always traces back to one of these causes:
- PEX not fully inserted. If the tubing doesn’t reach its full seated depth in a push-fit, press, or barb fitting, the seal (O-ring or barb grip) can’t do its job.
- Copper not properly prepared. Scale, oxidation, or an uneven cut on the copper end can prevent an O-ring from sealing or prevent solder from flowing correctly.
- Damaged copper surface. Scratches, dents, or pitting in the sealing zone of a push-fit or press connection create a path for water to bypass the O-ring.
- Burrs left on the cut edge. An un-deburred edge can cut or roll the internal O-ring during insertion.
- Old solder or flux residue. Leftover residue on a reused fitting or pipe section can prevent a new solder joint from bonding properly.
- Incorrect fitting for the application. Using a fitting not rated for your PEX type, pressure, or temperature range can lead to a poor or failed seal.
- Wrong fitting size. A fitting slightly mismatched to actual pipe diameter may seem to fit but won’t seal reliably under pressure.
- Incompatible tubing/fitting combination. For example, using a fitting designed for one manufacturer’s PEX-A expansion system with a different brand’s tubing.
- Damaged O-ring. A cut, twisted, or missing O-ring in a push-fit or press fitting is a common and easy-to-miss cause of leaks.
- Incorrect crimp. An under-crimped or over-crimped ring may not grip the barb fitting tightly enough to seal.
- Incorrectly positioned crimp or cinch ring. A ring placed too far from the tubing end, or not fully closed, won’t compress the tubing against the barb correctly.
- Damaged PEX tubing. A kinked, nicked, or out-of-round tubing end won’t seat evenly in the fitting.
- Installation outside manufacturer instructions. Skipping a required step — such as a specific insertion-depth mark or a required gauge check — can produce a joint that looks fine but fails under pressure.
Troubleshooting steps:
- Shut off the water and relieve pressure before inspecting.
- Disassemble the connection if the method allows it (push-fit fittings with a release tool, or a crimp/cinch joint you’re willing to cut and redo).
- Inspect the copper and PEX ends for the specific issues listed above — cuts, burrs, scratches, or an incomplete seat.
- Re-cut and re-prepare both pipe ends if there’s any doubt about the surface condition.
- Replace the fitting if the O-ring is damaged or if it’s been reused past what the manufacturer allows.
- Reassemble carefully, confirming full insertion depth and, for crimp/cinch joints, correct ring position and a gauge check.
- Restore water gradually and monitor the joint closely for several hours, then check again after a day of normal use.
Common PEX-to-Copper Connection Mistakes
- Using the wrong transition fitting for the PEX type or connection system in use.
- Cutting copper unevenly, which prevents a full, even seal in either a soldered or mechanical joint.
- Failing to deburr the cut edge, leaving a sharp lip that can damage an O-ring or block solder flow.
- Leaving a damaged or scratched sealing surface on the copper under a push-fit or press connection.
- Connecting PEX before the soldered copper fitting has cooled, which can soften or deform the tubing.
- Using the wrong crimp, cinch, or expansion system for the tubing type installed.
- Incorrect ring placement on a crimp or cinch connection.
- Failing to fully insert PEX to the fitting’s required depth.
- Mixing incompatible fitting systems, such as combining parts from different manufacturers that aren’t designed to interoperate.
- Ignoring the manufacturer’s instructions in favor of “how it’s always been done,” even when a specific fitting has different requirements.
- Ignoring local plumbing code, particularly around which fitting types are approved for concealed installations.
- Installing a connection where the chosen fitting isn’t appropriate for the location — for example, using a fitting not rated for a specific temperature range near a water heater.
Safety and Code Considerations
- Shut off and drain the water supply before cutting into any existing pipe.
- If soldering, keep the torch flame away from framing, insulation, and any other combustible material, and have a way to extinguish a small fire nearby.
- Never heat PEX tubing directly — it isn’t rated for torch heat and will deform or fail.
- Let a soldered joint cool to a safe handling temperature before connecting PEX to it.
- Follow the specific fitting manufacturer’s installation instructions, including any required insertion depth, ring type, or tool.
- Check your local plumbing code before finalizing your method, especially for connections that will be concealed behind a wall, ceiling, or slab.
- For concealed runs, main shutoff work, or anything you’re not confident diagnosing, it’s worth bringing in a licensed plumber rather than guessing.
Which PEX-to-Copper Connection Method Is Best?
There isn’t one universally best method — the right choice depends on your situation, tools, and the location of the connection. Here’s how that typically plays out:
Situation: “I need a quick repair and don’t want to solder.” Consider: A compatible push-to-connect transition fitting.
Situation: “I’m installing a permanent copper-to-PEX transition in an accessible area.” Consider: A sweat-to-PEX adapter, using the PEX connection method (crimp, cinch, or barb) that matches your tubing and tools.
Situation: “I already own a PEX crimp or cinch tool.” Consider: A sweat adapter paired with a barb fitting compatible with that specific crimp or cinch system.
Situation: “I already own a press tool system.” Consider: An appropriate press transition fitting sized and jawed to match.
Situation: “I’m using PEX-A.” Consider: A fitting and connection method specifically approved for that PEX-A system — often an expansion fitting, though crimp, cinch, push-fit, and press options may also be compatible depending on brand.
Situation: “This connection will be concealed behind a finished wall.” Consider: Check your local code and the fitting manufacturer’s guidance on which connection types are approved for concealed use before choosing a method.
In every case, match the method to the fitting manufacturer’s instructions and your local plumbing code — not just to whichever tool happens to be in your bag.
Final Takeaway
Connecting PEX to copper is straightforward when you use the right transition fitting and connection method. For an accessible repair where you want to avoid soldering, a compatible push-to-connect fitting is often the simplest approach. If you prefer a traditional installation, a sweat-to-PEX adapter combined with the appropriate PEX connection system is another option.