
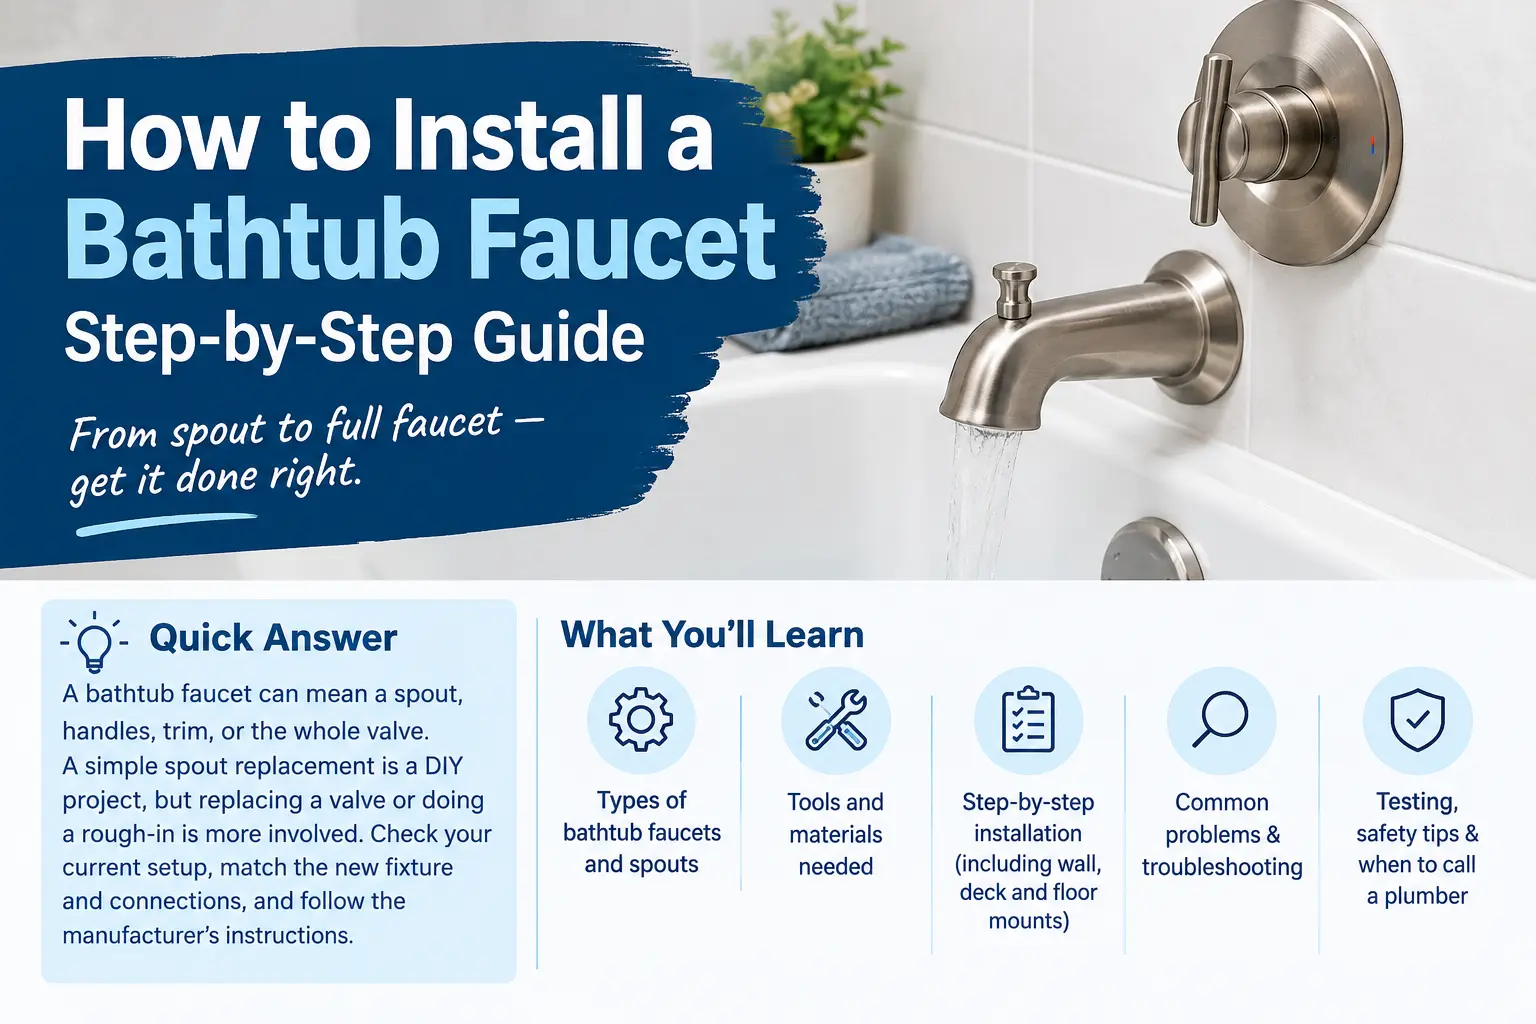
How to Install a Bathtub Faucet: Step-by-Step Guide
Quick answer: Installing a bathtub faucet is usually easier than it sounds, but the first step is figuring out what you actually need to replace. If you’re changing only the tub spout, handles, or trim, this can often be a straightforward DIY project. Replacing the valve inside the wall is more involved and may require opening the wall.
Not sure which one you have? Don’t buy anything yet. Remove the old spout or handle trim and check how it’s connected. A few minutes of checking now can save you from buying the wrong faucet and having to redo the job.
In this guide, we’ll show you how to identify your setup, install a new bathtub faucet step by step, and fix the common problems that can come up along the way.
How to Install a Wall-Mounted Bathtub Faucet
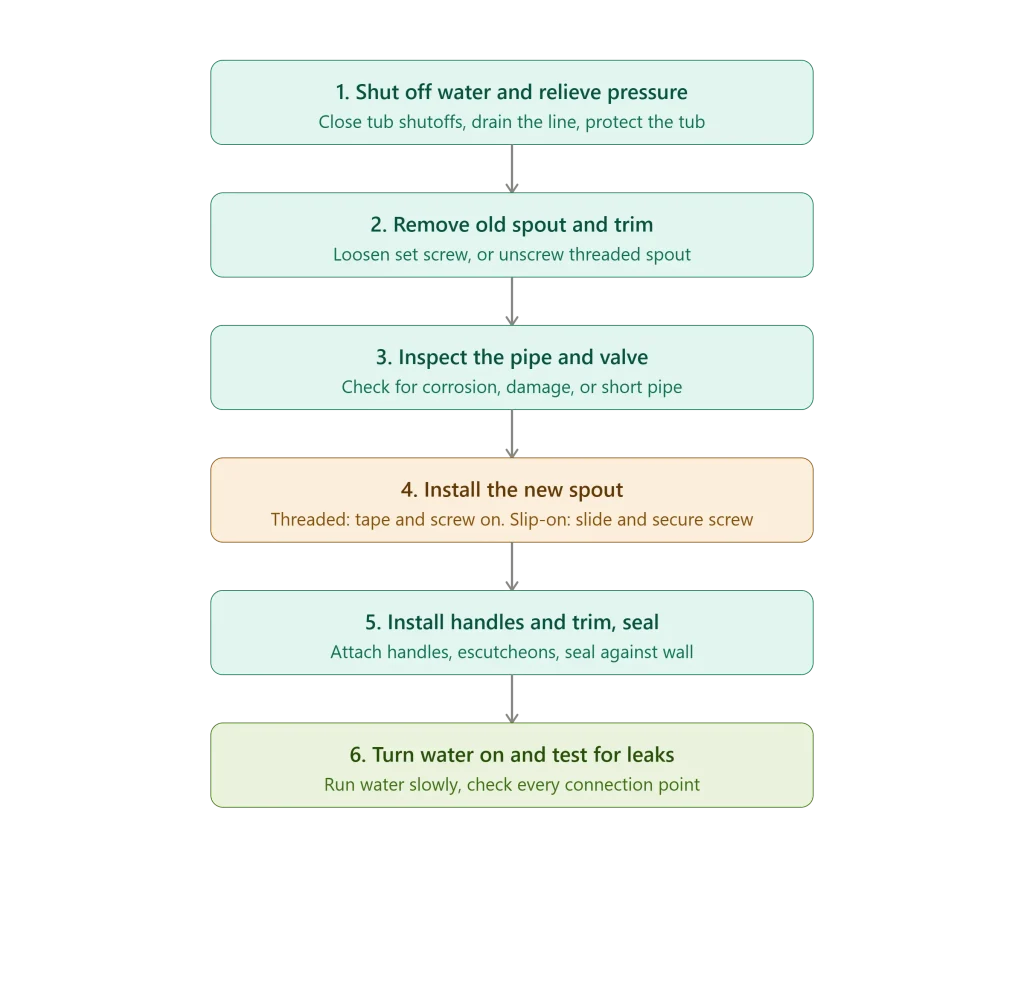
1. Shut Off the Water Supply
Locate the shutoff valves for the tub, or shut off the main water supply if there’s no dedicated shutoff. Skipping this step is the most common cause of an accidental bathroom flood mid-project.
2. Relieve Pressure and Protect the Tub
Open the faucet to drain remaining water and relieve pressure in the line. Lay a towel in the tub to protect the finish from dropped tools or wrenches.
3. Remove the Old Tub Spout and Faucet Trim
For a slip-on spout, loosen the set screw underneath and pull the spout straight off. For a threaded spout, unscrew it counterclockwise, using a strap wrench if it won’t budge by hand. Remove handles by taking off any decorative cap, unscrewing the handle screw, and lifting the handle and escutcheon away from the wall.
4. Inspect the Pipe and Valve
Check the exposed pipe or nipple for corrosion, damage, or an unusual length. If the pipe is cracked, badly corroded, or too short for the new spout to seat properly, that’s a sign you may need a plumber before going further.
5. Install a Threaded Tub Spout
Wrap the threaded nipple with PTFE tape (typically two to three wraps, though this varies by product), then thread the new spout on by hand and snug it with a strap wrench per the manufacturer’s instructions. Don’t overtighten — cracked spouts are a common result.
6. Install a Slip-On Tub Spout
Slide the new spout over the pipe until it sits flush against the wall, then tighten the set screw underneath with a hex key until it’s snug. Avoid overtightening, which can strip the screw or damage the pipe.
7. Install the Faucet Handles and Trim
Match the new trim to the existing valve stems, seat the escutcheon flush against the wall, and secure the handle with its screw and decorative cap. Manufacturer instructions vary significantly here depending on valve brand, so follow the included documentation closely.
8. Seal Around the Fixture Where Required
If the manufacturer calls for it, run a thin bead of silicone sealant around the spout base or escutcheon where it meets the wall to prevent water from getting behind the tile or surround.
9. Turn the Water Back On and Test for Leaks
Turn the water supply back on slowly and run the faucet, checking the spout, handles, and any exposed connections for drips. Let it run for a few minutes — small leaks sometimes take a moment to show up.
How to Install a Deck-Mounted or Roman Tub Faucet
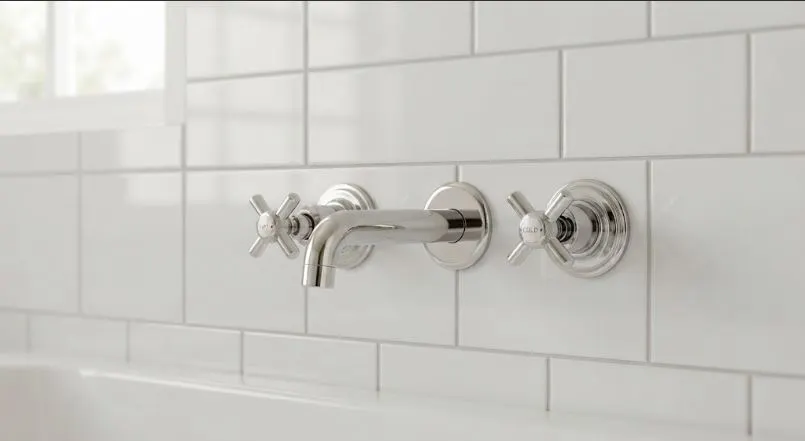
Check the Number and Spacing of Mounting Holes
Roman tub faucets are sold to match specific hole configurations. Measure the spacing between your existing holes (or the holes specified for your tub) before buying a replacement, since faucets aren’t interchangeable across different hole spreads.
Install the Rough-In Valve
Deck-mounted and Roman tub faucets connect to a rough-in valve installed beneath the deck. If this valve isn’t already in place and compatible with your new faucet, this becomes a rough-in plumbing job rather than a simple fixture swap.
Connect the Hot and Cold Supply Lines
Connect the hot and cold lines to the rough-in valve according to the manufacturer’s diagram. Confirm hot and cold aren’t reversed before finishing the connections.
Install the Faucet Trim and Handles
Secure the faucet body to the deck using the manufacturer’s mounting hardware, then attach the handles.
Install the Spout and Hand Shower if Included
Attach the spout and, if the kit includes one, the hand shower or diverter assembly, following the specific sequence in the manufacturer’s instructions.
Test Flow, Temperature, and Leaks
Turn the water on gradually and check flow, hot/cold accuracy, and every connection point for leaks before considering the install finished.
How to Install a New Bathtub Faucet Valve
When the Valve Needs to Be Replaced
Signs include persistent leaking that a cartridge replacement doesn’t fix, a valve that’s the wrong type for your new trim, or a valve that’s failing structurally (corrosion, cracking, or mineral buildup that prevents proper operation).
Why Valve Replacement Is More Involved
The valve is soldered, glued, or crimped directly into the supply lines behind the wall. Replacing it means cutting into the wall, disconnecting and reconnecting pipe, and closing the wall back up afterward — categorically different from swapping a spout or handle.
Check the Manufacturer’s Rough-In Requirements
New valves are built around specific rough-in dimensions and connection types. Confirm the replacement matches your existing pipe material and layout, or plan to adapt the plumbing to fit it.
When Wall Access Is Necessary
If there’s no access panel behind the tub wall, you’ll likely need to cut an opening, ideally in a location that can be covered afterward (such as from a closet on the other side of the wall) rather than through finished tile.
First, Identify What You’re Installing
A bathtub faucet is really a system of parts, and you may only be touching one of them.
- Tub spout — the piece the water comes out of. Often the only part that needs replacing.
- Handles and trim — the visible knobs, levers, and cover plates (escutcheons) you turn to run the water.
- Cartridge — the small internal part inside the valve that controls water flow and mixing. It’s what usually fails when a faucet drips or gets hard to turn.
- Valve — the mechanism inside the wall that the handles and spout connect to. This is what’s actually plumbed into your supply lines.
- Diverter — the mechanism (in the spout or as a separate handle) that redirects water from the tub spout up to the showerhead.
Replacing only a bathtub spout
This is the simplest job covered here. You’re unscrewing or pulling off the old spout and putting on a new one that fits the same pipe or nipple. No water shutoff to the whole house is required in most cases, though you should still shut off the tub’s supply if you have access to it.
Replacing faucet handles and trim
This swaps out the visible hardware — handles, escutcheons, and sometimes the spout — while leaving the valve in the wall untouched. Trim kits are typically sold to match a specific valve brand and series, so this is a compatibility-first job.
Replacing the bathtub faucet valve
This means removing the part inside the wall and installing a new one. It almost always requires cutting into the wall behind the tub (or through an access panel) and sweating, gluing, or crimping new connections. This is a significantly more involved job than a spout or trim swap.
Installing a deck-mounted or Roman tub faucet
These mount directly to the tub deck or surround rather than the wall, using a set of pre-drilled holes. Installation involves connecting the faucet body to a rough-in valve and running supply lines up through the deck.
Installing a floor-mounted tub filler
A freestanding faucet that rises from the floor next to the tub. It connects to supply lines routed through the floor, which typically means new rough-in plumbing. This is generally not a first-time DIY project.
Bathtub Faucet Types and How They Connect
Slip-on tub spout
Slides over a copper pipe stub that protrudes from the wall and is secured with a small set screw underneath. There’s no threading involved — the spout simply slips on and gets locked in place.
Threaded tub spout
Screws onto a threaded pipe fitting (often called a nipple) that’s fixed to the wall. You twist the spout on like a cap, sometimes with thread seal tape underneath for a water-tight fit.
Diverter tub spout
A spout with a small pull-up rod on top. Lifting it redirects water up to the showerhead instead of out the spout. These come in both slip-on and threaded versions.
Single-handle bathtub faucet
One handle or lever controls both temperature and flow through a single cartridge. Common in newer installations and remodels.
Two- or three-handle bathtub faucet
Separate hot and cold handles (and sometimes a third handle for the diverter), each connected to its own valve stem or cartridge. Common in older homes.
Wall-mounted vs. deck-mounted faucets
Wall-mounted faucets connect to a valve inside the bathroom wall — this is the standard setup for most tub/shower combinations. Deck-mounted faucets, including Roman tub faucets, connect through holes drilled in the tub deck or surround instead, with plumbing routed underneath.
What Are You Installing? (Quick Reference)
| Component | What It Does | Typical Difficulty |
|---|---|---|
| Tub spout | Delivers water into the tub | Easy DIY |
| Handles/trim | Controls flow and temperature | Easy–moderate DIY |
| Cartridge | Regulates flow inside the valve | Moderate DIY |
| Valve | Connects fixture to supply lines | Plumber-level job |
| Deck-mounted/Roman faucet | Mounts to tub deck, needs rough-in valve | Moderate–advanced |
| Floor-mounted filler | Freestanding, floor-routed supply | Advanced, often pro job |
What You Need Before Installing a Bathtub Faucet
Tools
- Adjustable wrench
- Strap wrench (for removing stuck spouts without scratching the finish)
- Hex key/Allen wrench (many slip-on spouts use a set screw)
- Screwdriver
- Flashlight
- Rag or towel to protect the tub finish
Materials
- Replacement spout, trim, or faucet kit matched to your existing setup
- PTFE (Teflon) thread seal tape, for threaded connections
- Silicone sealant, if the manufacturer calls for sealing the spout or escutcheon against the wall
- Plumber’s putty, only if specified by the manufacturer
Check the existing plumbing
Before removing anything, note the pipe material (copper, PEX, or PVC), whether the spout is threaded or slip-on, and how far the pipe protrudes from the wall. If you’re unsure what’s behind the wall, PEX vs. Copper has a rundown on how to tell supply-line materials apart.
Slip-On vs. Threaded Tub Spouts
| Feature | Slip-On | Threaded |
|---|---|---|
| How it connects | Slides over a smooth copper pipe stub | Screws onto a threaded fitting or nipple |
| How to identify it | No visible threads on the pipe; spout has a set screw underneath | Threads visible on the pipe when the spout is off |
| Installation method | Slide on, align, tighten set screw | Apply thread tape, hand-tighten, then snug with a strap wrench |
| Removal method | Loosen set screw with a hex key, then pull straight off | Unscrew counterclockwise, using a strap wrench if stuck |
| Common mistake | Forgetting to fully loosen the set screw before pulling | Overtightening and cracking the spout, or cross-threading |
| When replacement gets difficult | Set screw is stripped or rusted in place | Fitting is corroded to the pipe, or old spout snaps during removal |
Common Bathtub Faucet Installation Problems
The New Tub Spout Does Not Fit
Cause: Mismatched connection type (slip-on vs. threaded) or wrong pipe projection length. Fix: Confirm connection type before buying; some spouts have adjustable-depth designs that accommodate different pipe lengths. Call a plumber if: the pipe itself appears to be the wrong length or type for any standard replacement spout.
The Tub Spout Is Too Loose
Cause: Set screw isn’t fully tightened, or the pipe diameter doesn’t match the spout. Fix: Retighten the set screw; if the pipe is undersized, look for a spout designed for that diameter or a compatible adapter. Call a plumber if: the pipe itself is damaged or loose in the wall.
The Tub Spout Leaks at the Wall
Cause: Missing or degraded seal between the spout and the wall surface. Fix: Apply silicone sealant around the base per manufacturer instructions. Call a plumber if: water appears to be coming from behind the wall rather than just around the spout’s edge.
The Set Screw Will Not Tighten
Cause: Stripped screw threads or a screw that’s rusted in place. Fix: Try a slightly larger hex key size for a snugger grip, or replace the screw if the spout kit includes a spare. Call a plumber if: the screw is seized and attempts to free it risk damaging the pipe.
The Threaded Spout Is Hard to Remove
Cause: Corrosion or old thread sealant bonding the spout to the nipple. Fix: Use a strap wrench for grip without scratching the finish, and apply steady, even pressure rather than force. Call a plumber if: the spout won’t budge and you’re concerned about snapping the pipe behind it.
The New Faucet Does Not Match the Existing Valve
Cause: Trim kits are typically brand- and series-specific to a matching rough-in valve. Fix: Identify your valve’s brand and model before buying trim; many manufacturers list compatible trim kits by valve series. Call a plumber if: the valve is unidentifiable or the brand no longer makes compatible trim.
Water Is Leaking Behind the Wall
Cause: A failed connection at the valve or supply line, only visible once concealed. Fix: This isn’t a DIY fix in most cases — concealed leaks can cause significant hidden water damage if left unaddressed. Call a plumber: immediately, before continuing any finish work.
The Diverter Is Not Working Properly
Cause: Worn diverter mechanism inside the spout, or a failing diverter valve behind the wall. Fix: If the diverter is part of the spout, replacing the spout often resolves it. If it’s a separate valve-based diverter, this may require cartridge or valve service. Call a plumber if: replacing the spout doesn’t solve the issue.
Common Problems and Solutions (Quick Reference)
| Problem | Likely Cause | First Fix |
|---|---|---|
| Spout won’t fit | Wrong connection type or pipe length | Confirm slip-on vs. threaded before buying |
| Spout leaks at wall | Missing seal | Apply silicone per manufacturer instructions |
| Spout won’t tighten | Stripped or worn set screw | Try a larger hex key or replacement screw |
| Threaded spout won’t budge | Corrosion or old sealant | Use a strap wrench, steady pressure |
| Trim doesn’t match valve | Incompatible brand/series | Identify valve brand and model first |
| Leak behind wall | Failed valve or supply connection | Stop and call a plumber |
How to Test a Newly Installed Bathtub Faucet
Turn the water supply back on gradually rather than all at once. Run the faucet through hot, cold, and diverter functions, checking every connection point — spout base, handle escutcheons, and any accessible supply lines — for drips. Let the water run for several minutes, since slow leaks don’t always appear immediately. If you had to open a wall for valve work, don’t close it back up until you’ve confirmed there are no leaks after running the water multiple times.
When Should You Call a Plumber?
Some situations go beyond a reasonable DIY fixture swap:
- Replacing a valve that requires opening the wall
- Damaged or corroded concealed plumbing
- Installing a floor-mounted tub filler or new rough-in
- Relocating water supply lines
- Persistent leaks after a straightforward reinstall
- Inability to locate or operate a water shutoff
- An unknown or clearly non-standard plumbing configuration behind the wall
None of these mean the job is impossible — they just mean the risk of hidden water damage outweighs the savings of doing it yourself.
Bathtub Faucet Installation FAQs
Do I need to shut off the main water supply to replace a tub spout? Not always. If there are dedicated shutoff valves for the tub, use those. If not, or if you’re unsure, shutting off the main supply is the safer choice.
Can I use any tub spout as a replacement? No. You need to match the connection type (slip-on or threaded) and, for slip-on spouts, the pipe diameter and length. Check your existing spout’s connection before buying a replacement.
Why does my new faucet trim not fit my old valve? Trim kits are generally matched to specific valve brands and series. If the trim doesn’t fit, you likely need a kit made for your exact valve, not just the same faucet style.
Is replacing a tub spout the same as replacing a bathtub faucet? Not necessarily. The spout is only one part of the faucet system. Replacing it doesn’t touch the valve, cartridge, or handles, which may still need separate attention if they’re the source of a problem.
How do I know if I have a slip-on or threaded tub spout? Look underneath the spout for a small set screw — that indicates slip-on. If there’s no set screw and the spout simply unscrews, it’s threaded.
Can I install a Roman tub faucet myself? If the rough-in valve and hole spacing are already in place and compatible, many homeowners can install the trim themselves. If you need to install or move the rough-in valve, that’s a bigger plumbing job.