How to Install PEX Fittings: A Step-by-Step Guide
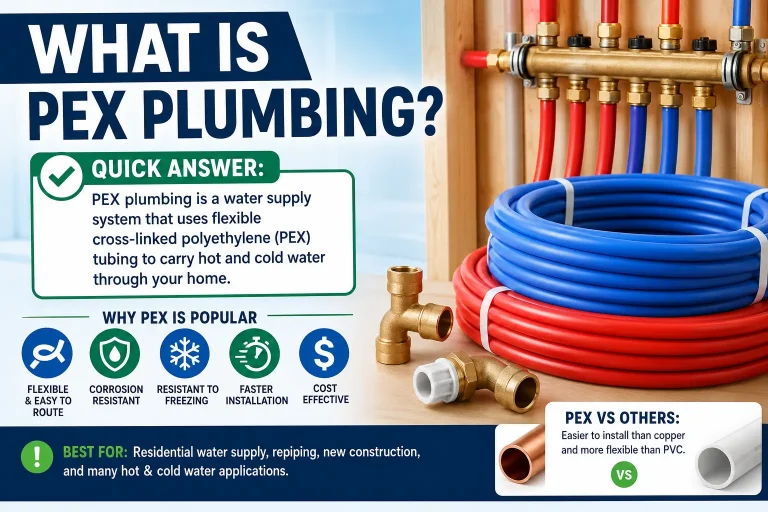
PEX plumbing is popular in American homes because it is flexible, durable, and easy to install. However, every PEX plumbing system needs secure connections. These connections join pipes, valves, manifolds, and water supply lines.
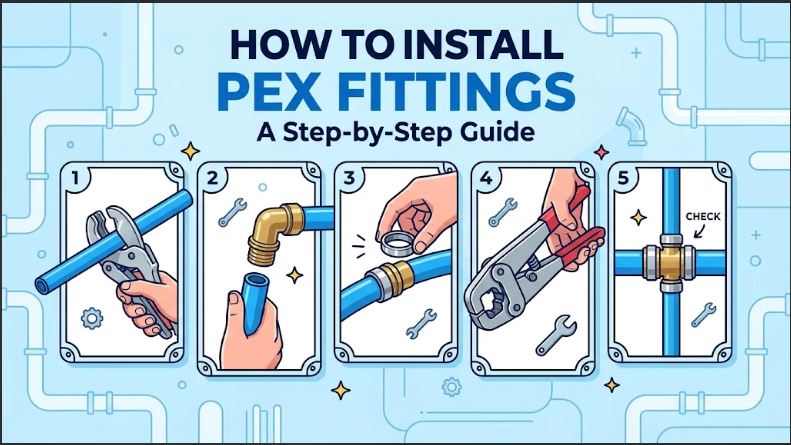
To install PEX fittings, cut the PEX pipe squarely, choose a compatible fitting system, insert the fitting, and secure it using the correct tool. You can use crimp fittings, clamp fittings, expansion fittings, or push-to-connect fittings. Each method has its own installation steps and requirements.
The right method depends on your PEX pipe, fitting type, available tools, and plumbing application. This guide explains how to install each type of PEX fitting, check connections, and avoid common mistakes.
What Are PEX Fittings?
PEX fittings are connectors used to join sections of PEX tubing or connect PEX pipes to other plumbing components. They create secure connections in hot and cold water distribution systems.
Most PEX fittings have a barbed or ribbed end that fits inside the pipe. A ring, clamp, or expansion sleeve helps secure the connection. Some fittings use a push-to-connect design instead.
PEX fittings come in different materials and shapes. Common options include:
- Couplings: Join two sections of PEX pipe.
- Elbows: Change the direction of a water line, usually by 90 degrees.
- Tees: Split one water line into two branches.
- Adapters: Connect PEX tubing to threaded or other plumbing connections.
- Manifold fittings: Connect individual water supply lines to a central distribution point.
- Transition fittings: Connect PEX tubing to compatible copper, CPVC, or other approved piping systems.
Choosing the correct fitting is important. The fitting must match the pipe size, connection method, and intended use.
Types of PEX Fittings and Connection Methods
Before learning how to install PEX fittings, understand the main connection methods. Each method uses different components and tools.
1. PEX Crimp Fittings
PEX crimp fittings use a barbed fitting and a copper crimp ring. The ring fits around the outside of the pipe. A crimping tool compresses the ring to secure the connection.
This is one of the most common PEX connection methods in residential plumbing.
Crimp systems commonly use metal insert fittings that meet ASTM F1807 or plastic insert fittings that meet ASTM F2159.
2. PEX Clamp Fittings
PEX clamp fittings work in a similar way to crimp fittings. However, they use a stainless steel clamp instead of a copper ring.
A compatible clamp tool tightens the clamp around the pipe and fitting. The clamp creates pressure that holds the pipe against the fitting.
Many systems use stainless steel clamps that meet ASTM F2098.
3. PEX Expansion Fittings
PEX expansion fittings use an expansion ring and a special expansion tool.
The tool expands the pipe and ring. You then insert the fitting into the enlarged pipe opening. The pipe naturally contracts around the fitting and creates a secure connection.
This method commonly uses ASTM F1960 fittings and compatible PEX reinforcing rings.
4. Push-to-Connect PEX Fittings
Push-to-connect fittings use an internal gripping and sealing system. You push the prepared pipe into the connector until it reaches the required insertion depth.
These fittings do not require a traditional crimp or expansion tool. However, some products require additional components, such as a pipe stiffener.
Always follow the fitting manufacturer’s instructions. Many push-to-connect systems are listed to ASSE 1061.
Tools and Materials Needed to Install PEX Fittings
Prepare the correct tools before starting your installation. Using the wrong tool can damage the pipe or create a weak connection.
Here are the common tools and materials you may need:
| Tool or material | Purpose |
|---|---|
| PEX tubing cutter | Makes clean, square cuts |
| PEX crimp tool | Compresses copper crimp rings |
| PEX clamp tool | Secures stainless steel clamps |
| PEX expansion tool | Expands tubing and reinforcing rings |
| Go/No-Go gauge | Checks compatible crimp connections |
| Measuring tape | Measures pipe lengths |
| Marker | Marks cutting and insertion points |
| Compatible PEX fittings | Joins pipes and plumbing components |
| Crimp rings or clamps | Secure the fitting connection |
| Safety glasses | Protect your eyes during installation |
You do not need every tool for every connection. Choose the tools that match your fitting system.
For example, a crimp tool cannot replace an expansion tool. Likewise, a standard pair of pliers cannot create a proper crimp connection.
How to Choose the Right PEX Fittings
Choosing the correct fitting is just as important as installing it correctly. An incompatible fitting or ring can cause leaks and connection failure.
Consider these factors before buying PEX fittings.
Check the PEX Pipe Size
PEX pipes are available in several sizes. Common residential sizes include 1/2-inch, 3/4-inch, and 1-inch tubing.
Your fitting must match the nominal size of the pipe. For example, a 1/2-inch PEX pipe requires a compatible 1/2-inch fitting.
Check the pipe markings before purchasing connectors. Do not select fittings based only on how they look.
You can also read our guide to PEX pipe sizes to understand common residential pipe dimensions.
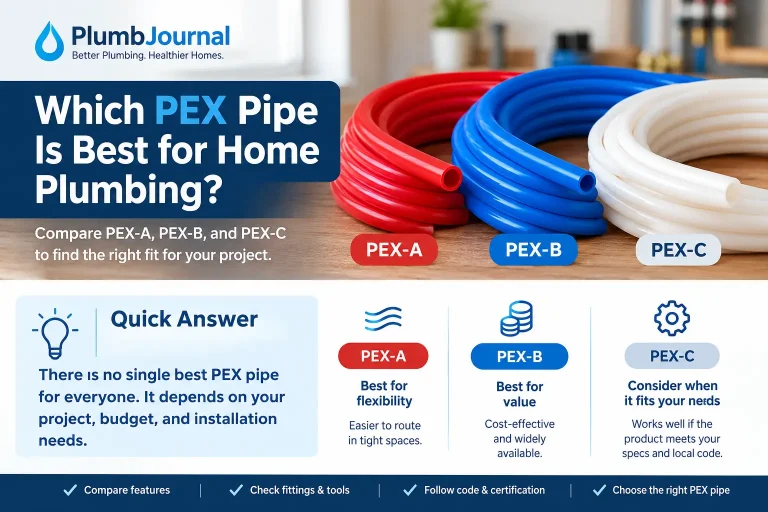
Understand PEX-A, PEX-B, and PEX-C Compatibility
PEX-A, PEX-B, and PEX-C describe different manufacturing methods. They do not automatically determine which fittings can be used.
Many approved insert-style crimp and clamp systems can work with compatible PEX-A, PEX-B, and PEX-C tubing. However, expansion systems have specific requirements.
For example, ASTM F1960 cold-expansion connections require compatible tubing, reinforcing rings, fittings, and tools.
Always check the tubing markings and fitting manufacturer’s compatibility information before joining different components.
Read our guide on PEX-A vs. PEX-B for a closer comparison.
Choose Between Brass and Plastic Fittings
PEX fittings are available in brass and approved polymer materials.
Brass fittings are strong and commonly used in residential plumbing. Polymer fittings are also widely used in approved PEX systems.
Neither material is automatically better for every installation. Consider the water conditions, application, product listing, and manufacturer’s recommendations.
Check the Connection Standard
Different PEX fitting systems use different industry standards.
| Standard | Connection type |
|---|---|
| ASTM F1807 | Metal insert fittings with copper crimp rings |
| ASTM F2159 | Plastic insert fittings with copper crimp rings |
| ASTM F1960 | Cold-expansion fittings with PEX reinforcing rings |
| ASTM F2098 | Stainless steel clamps |
| ASSE 1061 | Push-fit plumbing connections |
These standards help identify the fitting system and its intended components. Check the product markings before installation.
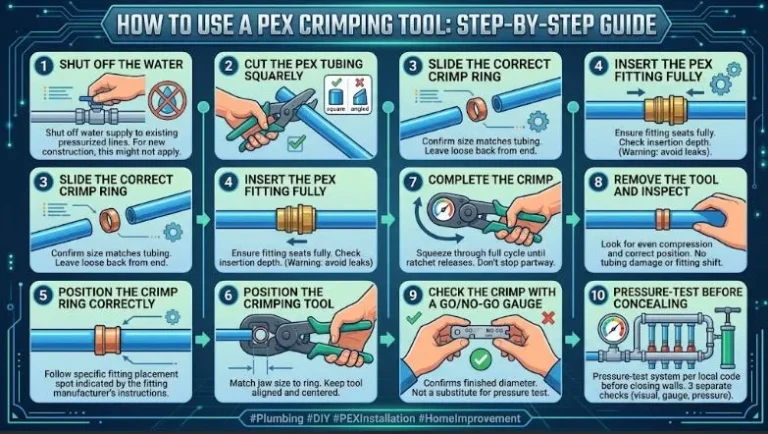
How to Install PEX Crimp Fittings (Step by Step)
PEX crimp fittings are a common choice for residential plumbing projects. The installation process is simple when you use compatible components and the correct tool.
Step 1: Turn Off the Water Supply
Before starting, shut off the water supply to the work area.
Open a nearby faucet to release pressure from the pipe. Allow the remaining water to drain before cutting the tubing.
Never cut into a pressurized water line.
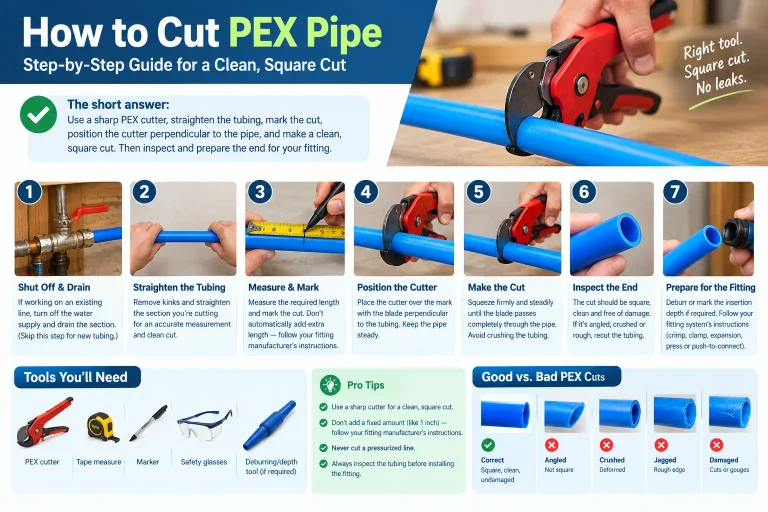
Step 2: Measure and Cut the PEX Pipe
Measure the required pipe length. Mark the cutting point with a marker.
Use a PEX tubing cutter to make a clean, square cut. Keep the cutter straight while cutting.
Avoid crushing or flattening the pipe. An uneven cut can prevent the fitting from seating correctly.
Step 3: Slide the Crimp Ring Onto the Pipe
Select the correct copper crimp ring for your pipe and fitting system.
Slide the ring over the end of the PEX pipe. Keep it away from the pipe opening while preparing the fitting.
Make sure the ring is clean and free from visible damage.
Step 4: Insert the PEX Fitting
Push the barbed end of the fitting into the pipe.
Continue until the pipe reaches the fitting shoulder or tube stop. The fitting should sit fully inside the tubing.
Do not force an incorrectly sized fitting into the pipe.
Step 5: Position the Crimp Ring
Slide the copper ring over the fitting’s barbed section.
For common ASTM F1807 and F2159 connections, the ring is generally positioned 1/8 to 1/4 inch from the end of the tubing.
Follow the exact positioning requirements provided by the fitting manufacturer.
Step 6: Crimp the Ring
Open the compatible crimp tool and place its jaws around the ring.
Keep the tool square to the pipe. Make sure the jaws fully cover the ring.
Complete the crimp according to the tool instructions. Do not make multiple crimps on the same ring.
Step 7: Inspect the Connection
Remove the tool and inspect the finished connection.
Look for:
- A properly positioned crimp ring.
- A ring without visible damage or distortion.
- A fitting that is fully inserted.
- No cracked or crushed tubing.
- A connection that passes the required Go/No-Go gauge inspection.
If the connection fails inspection, cut it out and install a new fitting and ring.
How to Install PEX Clamp Fittings
PEX clamp fittings use stainless steel clamps instead of copper crimp rings. They are another common option for residential plumbing.
Follow these steps to make a clamp connection.
Step 1: Prepare the PEX Pipe
Turn off the water supply and release pressure from the line.
Measure the pipe and cut it squarely with a PEX tubing cutter. Check the pipe end for cracks, dirt, or damage.
Step 2: Slide the Clamp Onto the Pipe
Select a stainless steel clamp that matches your pipe and fitting size.
Slide the clamp over the tubing. Keep it far enough from the end so you can insert the fitting.
Step 3: Insert the Fitting
Push the barbed fitting into the PEX pipe.
Make sure the pipe reaches the fitting shoulder or tube stop. The fitting should not sit at an angle.
Step 4: Position the Clamp
Move the stainless steel clamp over the fitting’s barbed section.
Follow the manufacturer’s positioning instructions. The clamp must cover the correct area of the fitting.
Step 5: Tighten the Clamp
Place the compatible clamp tool over the clamp’s fastening point.
Operate the tool according to its instructions. Some tools use a ratcheting system that releases when the clamp reaches the required position.
Do not use ordinary pliers to tighten the clamp.
Step 6: Inspect the Connection
Check that the clamp is secure and properly positioned.
Look for damaged tubing, an uneven clamp, or an incomplete connection.
Some clamp systems have specific inspection requirements. Follow the manufacturer’s instructions before testing the plumbing line.
How to Install PEX-A Expansion Fittings
PEX-A expansion fittings use the natural flexibility and recovery properties of compatible PEX tubing.
This method requires an expansion tool, a compatible reinforcing ring, and a fitting designed for the system.
Step 1: Cut the PEX-A Pipe
Measure the required pipe length and make a clean, square cut.
Remove any visible burrs or damaged material. The pipe end must be suitable for expansion.
Step 2: Install the Expansion Ring
Slide the approved expansion ring over the end of the PEX pipe.
Position it according to the manufacturer’s instructions. Some rings include a stop that helps with correct placement.
Step 3: Select the Correct Expansion Head
Attach the correct expansion head to your tool.
The head must match the pipe diameter. Using the wrong size can damage the tubing or create an improper connection.
Step 4: Expand the Pipe and Ring
Insert the expansion head into the pipe.
Operate the tool according to its instructions. If you use a manual tool, follow the specified expansion and rotation procedure.
Do not force the tool into the tubing or expand it too quickly.
Step 5: Insert the Expansion Fitting
Remove the expansion tool and insert the compatible fitting into the enlarged pipe opening.
Push the fitting in until it reaches the required position.
Step 6: Allow the Pipe to Contract
Hold the fitting in place as directed by the manufacturer.
The expanded PEX tubing and reinforcing ring contract around the fitting. This creates a tight mechanical connection.
Inspect the finished connection before testing the water line.
How to Install Push-to-Connect PEX Fittings
Push-to-connect fittings offer a different installation method. They do not require traditional crimp rings or expansion tools.
However, correct pipe preparation and insertion depth are essential.
Step 1: Turn Off the Water
Shut off the water supply and release pressure from the line.
Make sure the pipe is empty before starting.
Step 2: Cut the Pipe Squarely
Use a suitable PEX cutter to make a clean, straight cut.
Remove burrs and inspect the pipe end. A rough or damaged surface can affect the seal.
Step 3: Mark the Insertion Depth
Check the fitting manufacturer’s instructions for the required insertion depth.
Some fittings include an insertion-depth guide or visual indicator.
Use a marker to identify how far the pipe must enter the connector.
Step 4: Prepare the Pipe
Check whether your specific push-fit connector requires a pipe stiffener or insert.
Some systems require an internal support sleeve when connecting PEX tubing. Others have different preparation requirements.
Use only the components approved for that fitting.
Step 5: Push the Pipe Into the Fitting
Keep the pipe straight and aligned with the fitting opening.
Push it into the connector until it reaches the required insertion depth.
Do not stop halfway or insert the pipe at an angle.
Step 6: Inspect the Connection
Check the insertion-depth mark or visual indicator.
Make sure the pipe is fully seated and the fitting is not damaged.
Follow the product instructions for pressure testing and inspection.
How to Connect PEX to Copper, PVC, and CPVC
PEX plumbing systems often connect to other pipe materials. For example, you may need to connect a new PEX line to an existing copper water supply.
You cannot use an ordinary PEX-to-PEX fitting for every pipe material. Choose an approved transition fitting designed for both materials.
Connecting PEX to Copper
Use a compatible transition fitting designed for PEX and copper.
Depending on the product, the PEX side may use a crimp, clamp, expansion, or push-fit connection. The copper side may use solder, compression, or another approved connection method.
Follow the fitting instructions for both pipe ends.
Connecting PEX to PVC
Use a listed transition fitting that is approved for the specific PEX and PVC products.
Do not assume that PVC cement will bond PEX tubing. PEX requires a compatible mechanical connection.
Connecting PEX to CPVC
Choose a transition fitting approved for PEX and CPVC.
Check the fitting’s connection requirements on both sides. Some connectors use push-fit technology, while others use threaded or mechanical connections.
Always confirm that the transition fitting is approved for the intended water supply application.
How to Install PEX Fittings Without a Crimp Tool
You can install some types of PEX fittings without a traditional crimp tool.
However, you still need an approved connection method.
Here are some alternatives:
1. Push-to-connect fittings
These fittings use an internal gripping and sealing system. You prepare the pipe and push it into the connector to the required depth.
2. Approved compression fittings
Some compression-style products are designed for specific PEX applications. They may use nuts, inserts, or sleeves to secure the pipe.
3. Expansion fittings
Expansion systems do not use a crimp tool. However, they still require a compatible expansion tool and approved components.
Never use ordinary hose clamps, pliers, or household tools to imitate a PEX crimp connection. They cannot provide the controlled compression required by an approved fitting system.
How to Test PEX Fittings for Leaks
Testing is an important part of every PEX installation. Even a connection that looks correct can leak if it was not installed properly.
Follow the manufacturer’s testing instructions and the local plumbing code.
Step 1: Inspect Every Connection
Check each fitting before restoring the water supply.
Look for:
- Loose or damaged rings.
- Incorrectly positioned clamps.
- Cracked fittings.
- Damaged tubing.
- Incomplete push-fit connections.
- Signs of incorrect expansion.
Replace any connection that fails inspection.
Step 2: Restore the Water Supply Slowly
Open the water supply gradually.
Avoid sudden pressure changes. Allow the system to fill and check the connections as water enters the pipes.
Step 3: Check for Water Leaks
Inspect every connection carefully.
Look around fittings, elbows, tees, valves, and adapters. Pay special attention to areas that are difficult to access.
Use a dry cloth or paper towel to help identify small leaks.
Step 4: Complete the Required Pressure Test
Follow the pressure-testing procedure required by your local code and the manufacturer’s instructions.
The correct test pressure and duration depend on the system and applicable requirements. Do not assume that one testing procedure works for every PEX installation.
If you find a leak, shut off the water, release the pressure, and repair the defective connection before continuing.
Common PEX Fitting Installation Mistakes
Incorrect installation can lead to water leaks, damaged fittings, and expensive repairs.
Avoid these common mistakes when installing PEX fittings.
| Common mistake | Why it causes problems | How to avoid it |
|---|---|---|
| Using the wrong fitting size | Creates an improper connection | Match the fitting to the pipe size |
| Making an uneven cut | Prevents proper fitting insertion | Use a suitable PEX cutter |
| Using an incompatible ring | Can cause connection failure | Match the ring to the fitting system |
| Incorrect crimp positioning | May create an incomplete seal | Follow manufacturer measurements |
| Using the wrong tool | Can damage the pipe or fitting | Use approved tools |
| Crimping a ring more than once | Can distort the ring | Make one proper crimp |
| Incomplete fitting insertion | Reduces the secure contact area | Push the pipe to the fitting stop |
| Ignoring tool calibration | Can result in incorrect connections | Inspect and calibrate tools as required |
| Skipping inspection | Allows installation problems to go unnoticed | Inspect every completed joint |
A careful installation process helps prevent these problems. Never cover connections behind walls or ceilings before completing the required inspection and testing.
How to Fix a Leaking PEX Fitting
A leaking PEX fitting needs attention as soon as possible. Even a small leak can damage flooring, walls, or nearby building materials.
Follow these steps to address the problem.
- Turn off the water: Shut off the supply to the affected line.
- Release pressure: Open a nearby faucet and drain the remaining water.
- Locate the leak: Inspect the fitting, ring, clamp, and surrounding pipe.
- Check for damage: Look for cracks, loose components, or an incorrectly installed connection.
- Remove the defective section: Cut out the failed connection using a suitable pipe cutter.
- Install a new fitting: Use compatible tubing, fittings, rings, and tools.
- Inspect and test: Check the new connection and complete the required pressure test.
Do not try to fix a leaking crimp ring by adding another crimp over it. A defective crimp connection should be removed and replaced.
If the pipe is damaged, badly kinked, or difficult to access, contact a qualified plumber.
How to Remove and Replace PEX Fittings
You may need to remove a PEX fitting when repairing a water line or changing the plumbing layout.
The removal method depends on the fitting system.
For many crimp and clamp connections, the usual approach is to cut out the fitting and replace the affected section. Some manufacturers offer specific removal tools, but these must be approved for the product.
Push-to-connect fittings may have a release mechanism. Use the manufacturer’s release tool and instructions to remove the pipe safely.
Expansion connections also have product-specific removal requirements.
Before removing any fitting:
- Turn off the water supply.
- Release pressure from the line.
- Drain remaining water.
- Identify the connection type.
- Use the correct removal method.
Do not reuse damaged rings, clamps, or fittings unless the manufacturer specifically permits it.
How Much Does It Cost to Install PEX Fittings?
The cost of installing PEX fittings depends on the connection method, fitting material, pipe size, and number of connections.
A small DIY repair usually costs less than installing fittings throughout an entire home.
Your budget may include:
| Cost factor | What affects the cost |
|---|---|
| PEX fittings | Material, size, and fitting type |
| Crimp rings or clamps | Number of connections |
| PEX tubing | Pipe size and required length |
| Installation tools | Purchase or rental cost |
| Transition fittings | Connections to other pipe materials |
| Labor | Project size and plumbing complexity |
| Additional materials | Pipe supports, valves, and other accessories |
Crimp and clamp systems may be economical for smaller projects if you already own the tools. Expansion systems require a compatible expansion tool. Push-to-connect fittings may reduce tool requirements but can have a higher fitting cost.
For a larger project, compare the full material and labor costs before choosing a connection system.
You can also use our PEX plumbing cost estimator to plan your plumbing budget.
When Should You Hire a Professional Plumber?
Many homeowners can complete small PEX repairs with the correct tools and instructions. However, some plumbing projects require professional experience.
Consider hiring a licensed plumber when:
- You are replacing major sections of your home’s plumbing.
- You need to connect PEX to an unfamiliar pipe system.
- You cannot identify the correct fitting or connection method.
- Pipes are located inside walls, ceilings, or concrete.
- You have repeated leaks or water pressure problems.
- Your project requires permits or professional inspections.
- You are unsure whether your installation meets local plumbing codes.
A professional can check the existing plumbing system and help prevent installation errors.
Final Thoughts
Installing PEX fittings is a manageable plumbing task when you understand the connection method and use compatible materials. Crimp, clamp, expansion, and push-to-connect fittings each offer different installation options.
Start by identifying your PEX pipe size and fitting system. Prepare the pipe with a clean, square cut. Use the correct installation tool and inspect every connection before testing the water line.
Most importantly, follow the manufacturer’s instructions and local plumbing codes. A properly installed PEX connection helps create a reliable water supply system and reduces the risk of future leaks.